Pipeline Policies
Pipeline Policies are runtime validations that work for both scripted and declarative pipelines, and provide administrators a way to include warnings for or block the execution of pipelines that do not comply with the policies applied to your managed controller.
Create a Pipeline Policy
In this lab you will use CloudBees CI CasC for controllers to create a Pipeline Policy to enforce that all Pipeline jobs that run on your CloudBees CI managed controller (Jenkins instance) have a maximum 30 minute global timeout set.
- Navigate to your
cloudbees-ci-config-bundlerepository in GitHub and click on the Pull requests link.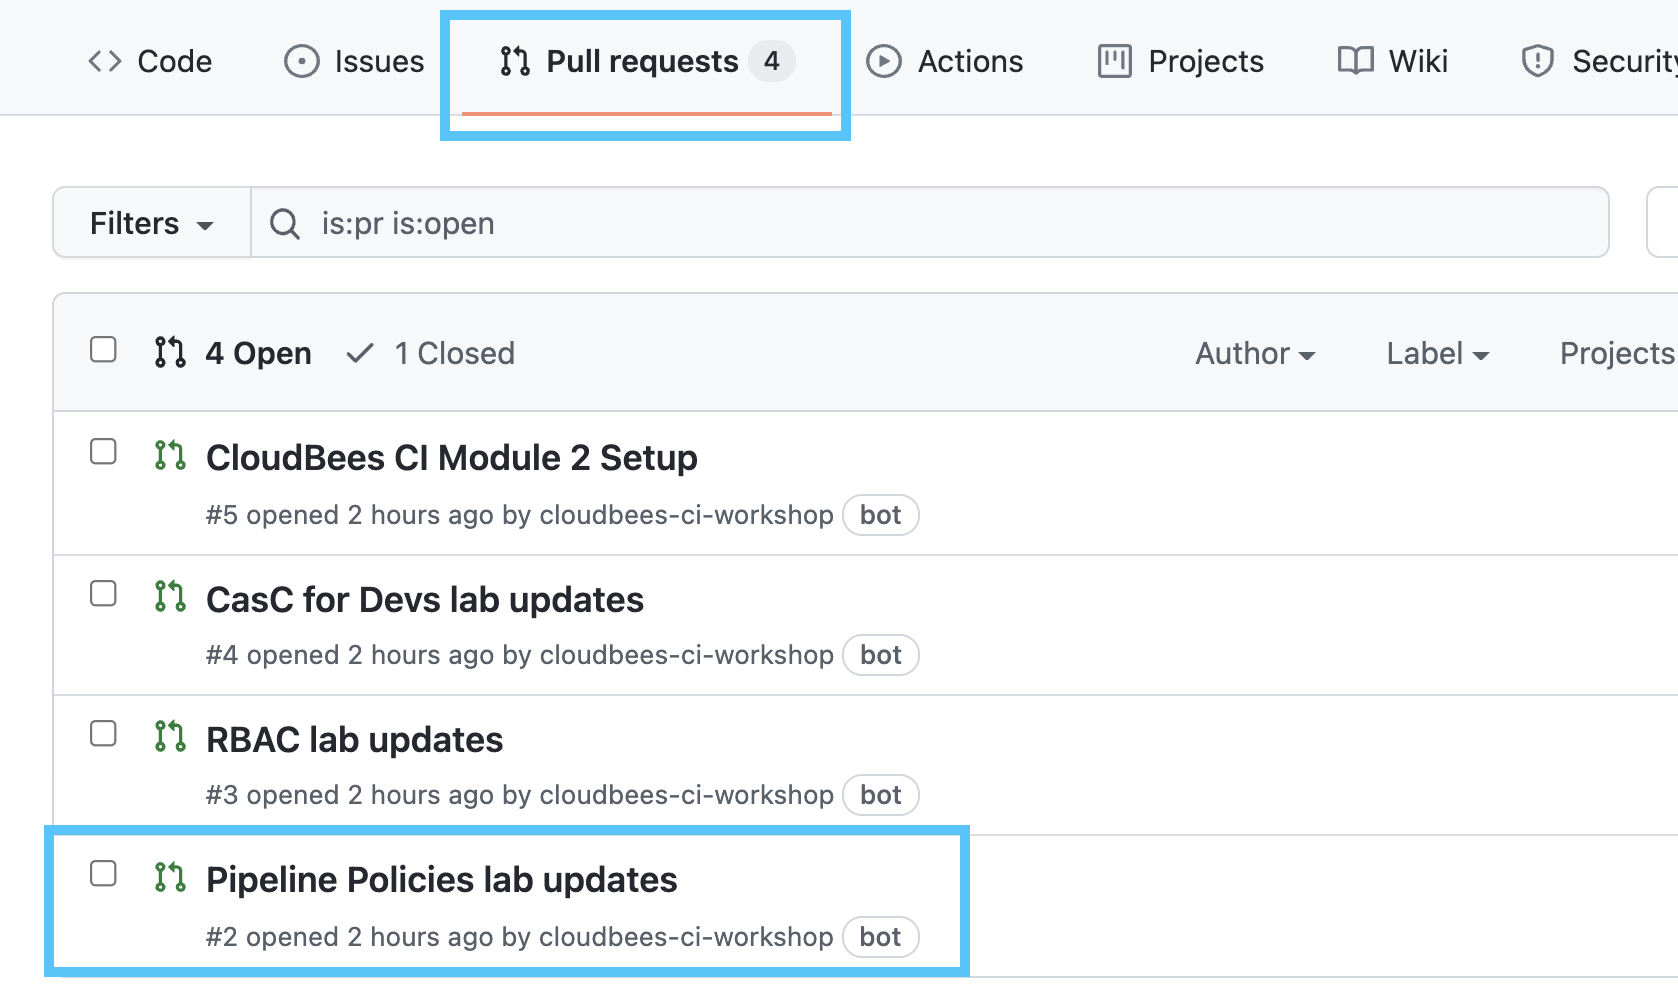
- On the next screen, click on the Pipeline Policies lab updates pull request and then click on the Files changed tab to review the requested configuration changes. Note the addition of the
cloudbees-pipeline-policiesconfiguration at the top of thejenkins.yamlfile. We also updated the bundle version and the Jenkins system message.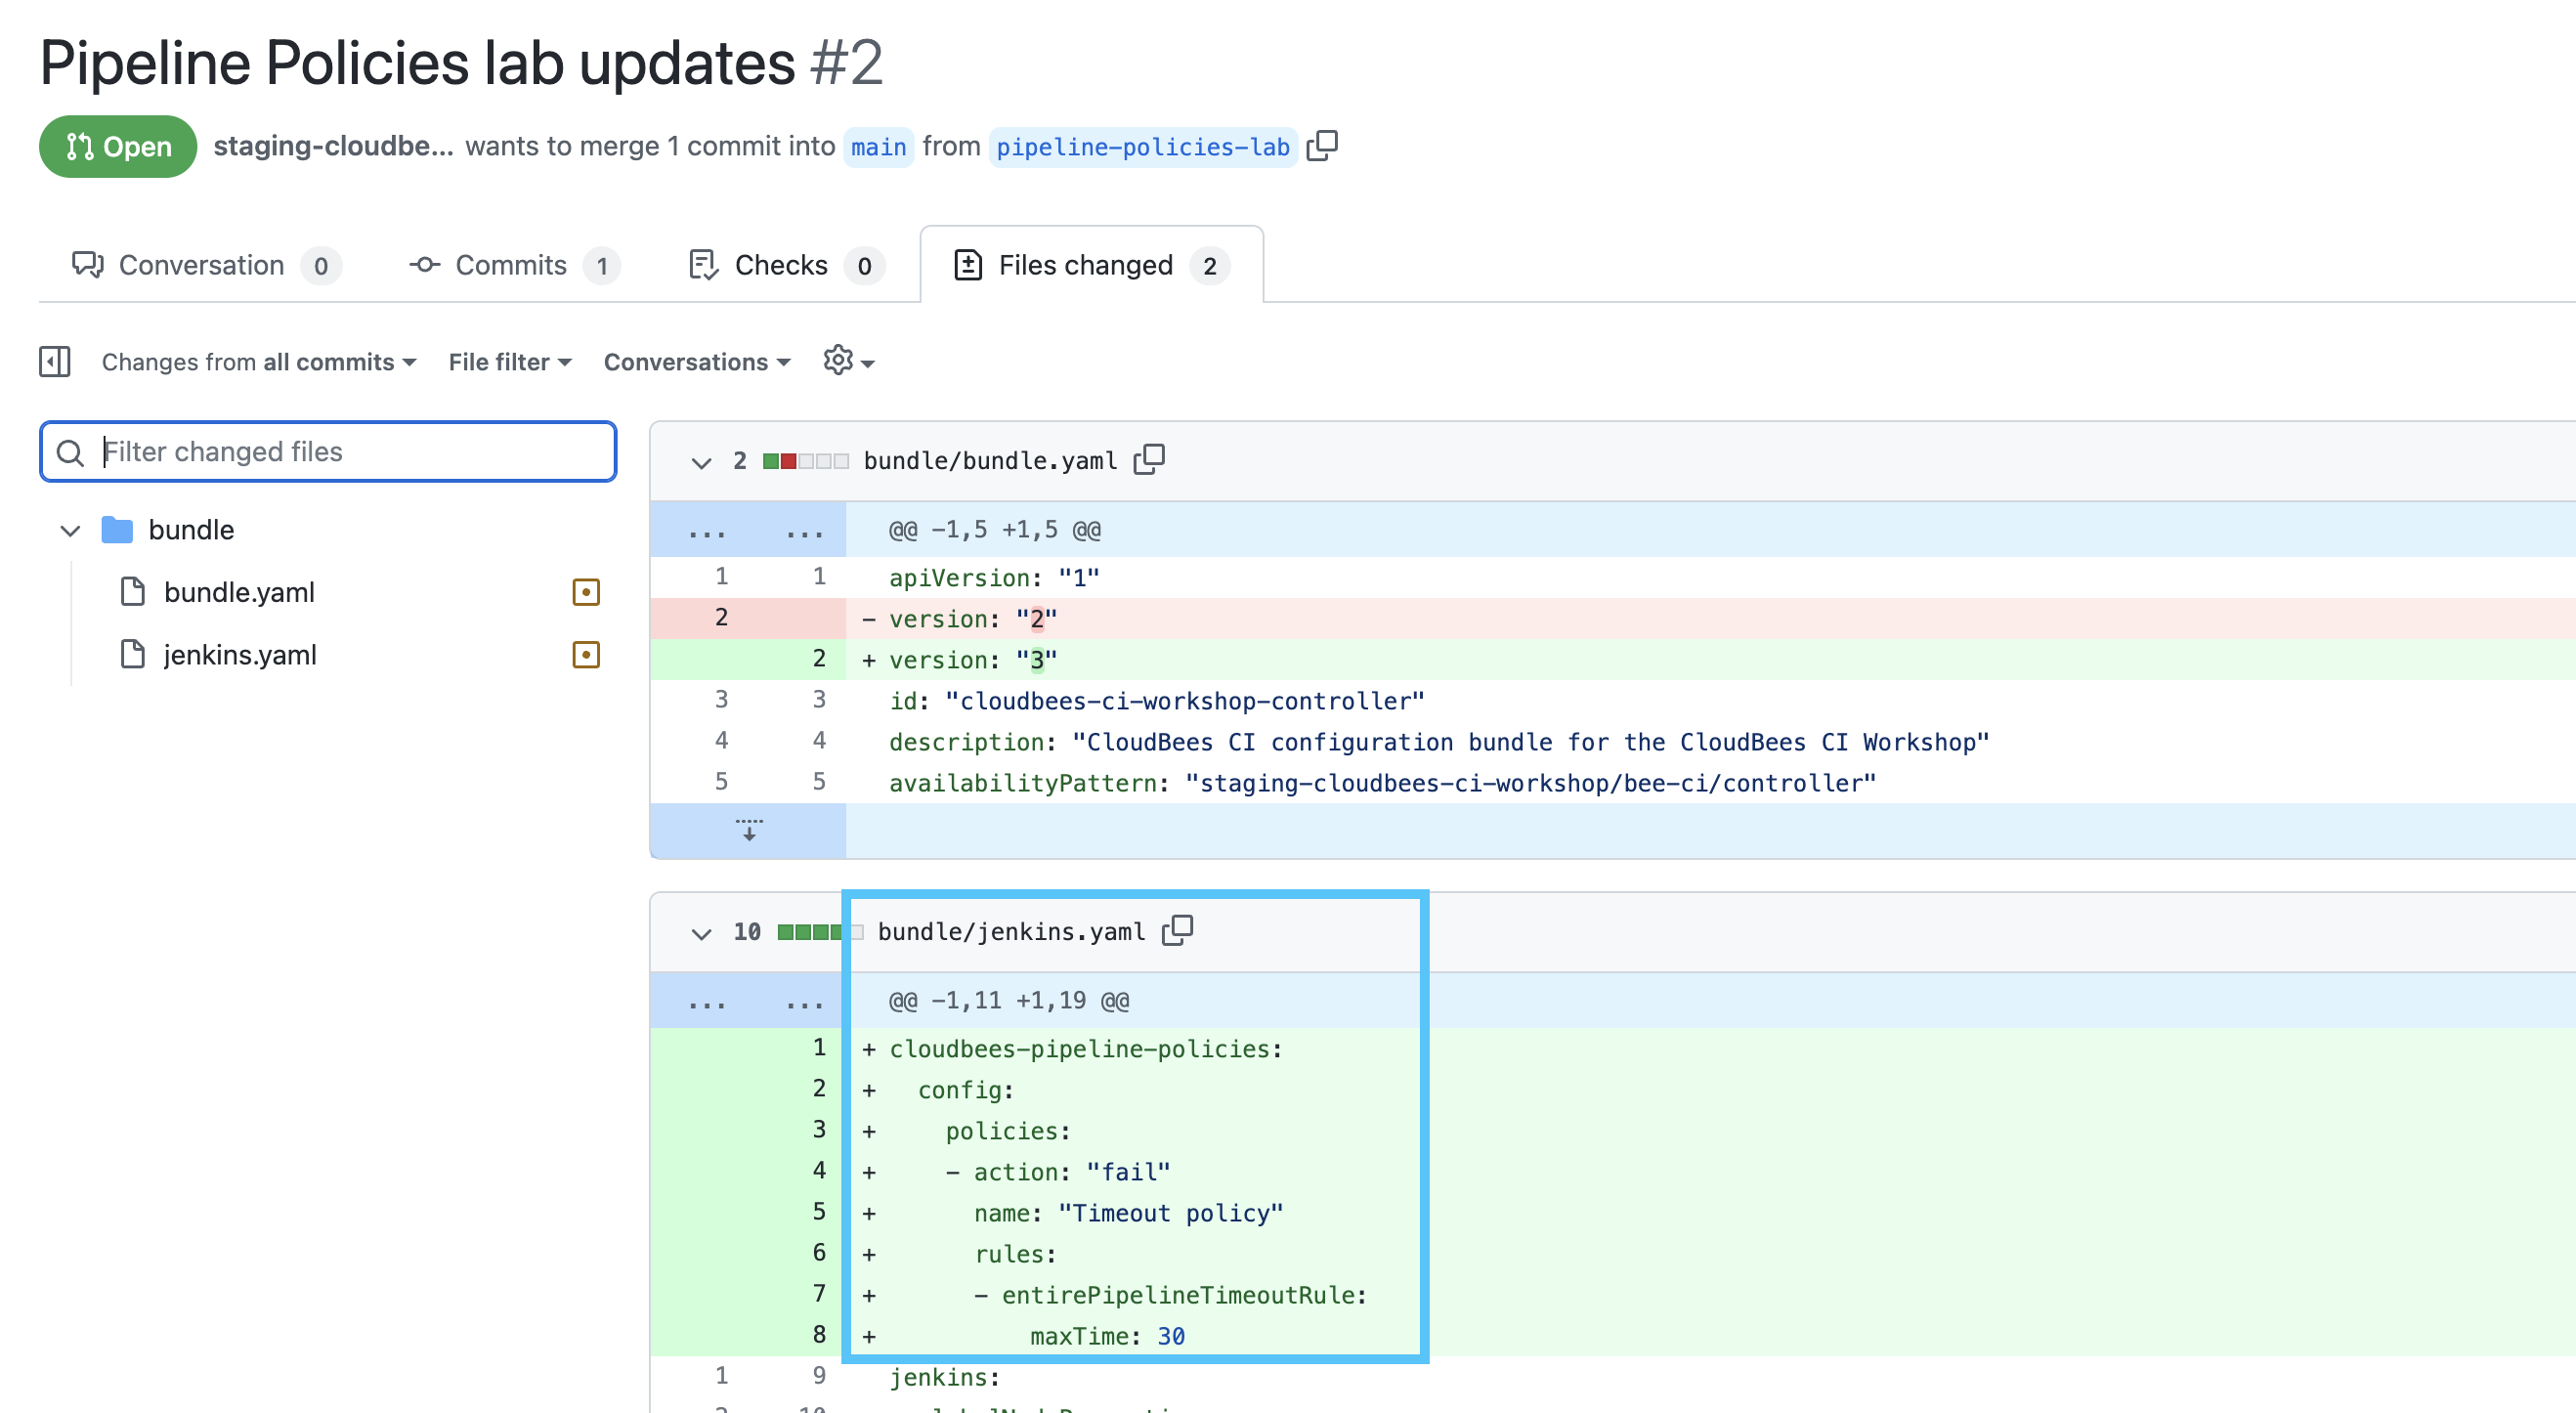
- Once you have reviewed the changed files, click on the Conversation tab, scroll down and click the green Merge pull request button and then the Confirm merge button.
- Navigate to the config-bundle-ops Multibranch Pipeline project under the template-jobs folder on your CloudBees CI managed controller.
- Shortly after the main branch job completes successfully navigate to the top-level of your managed controller.
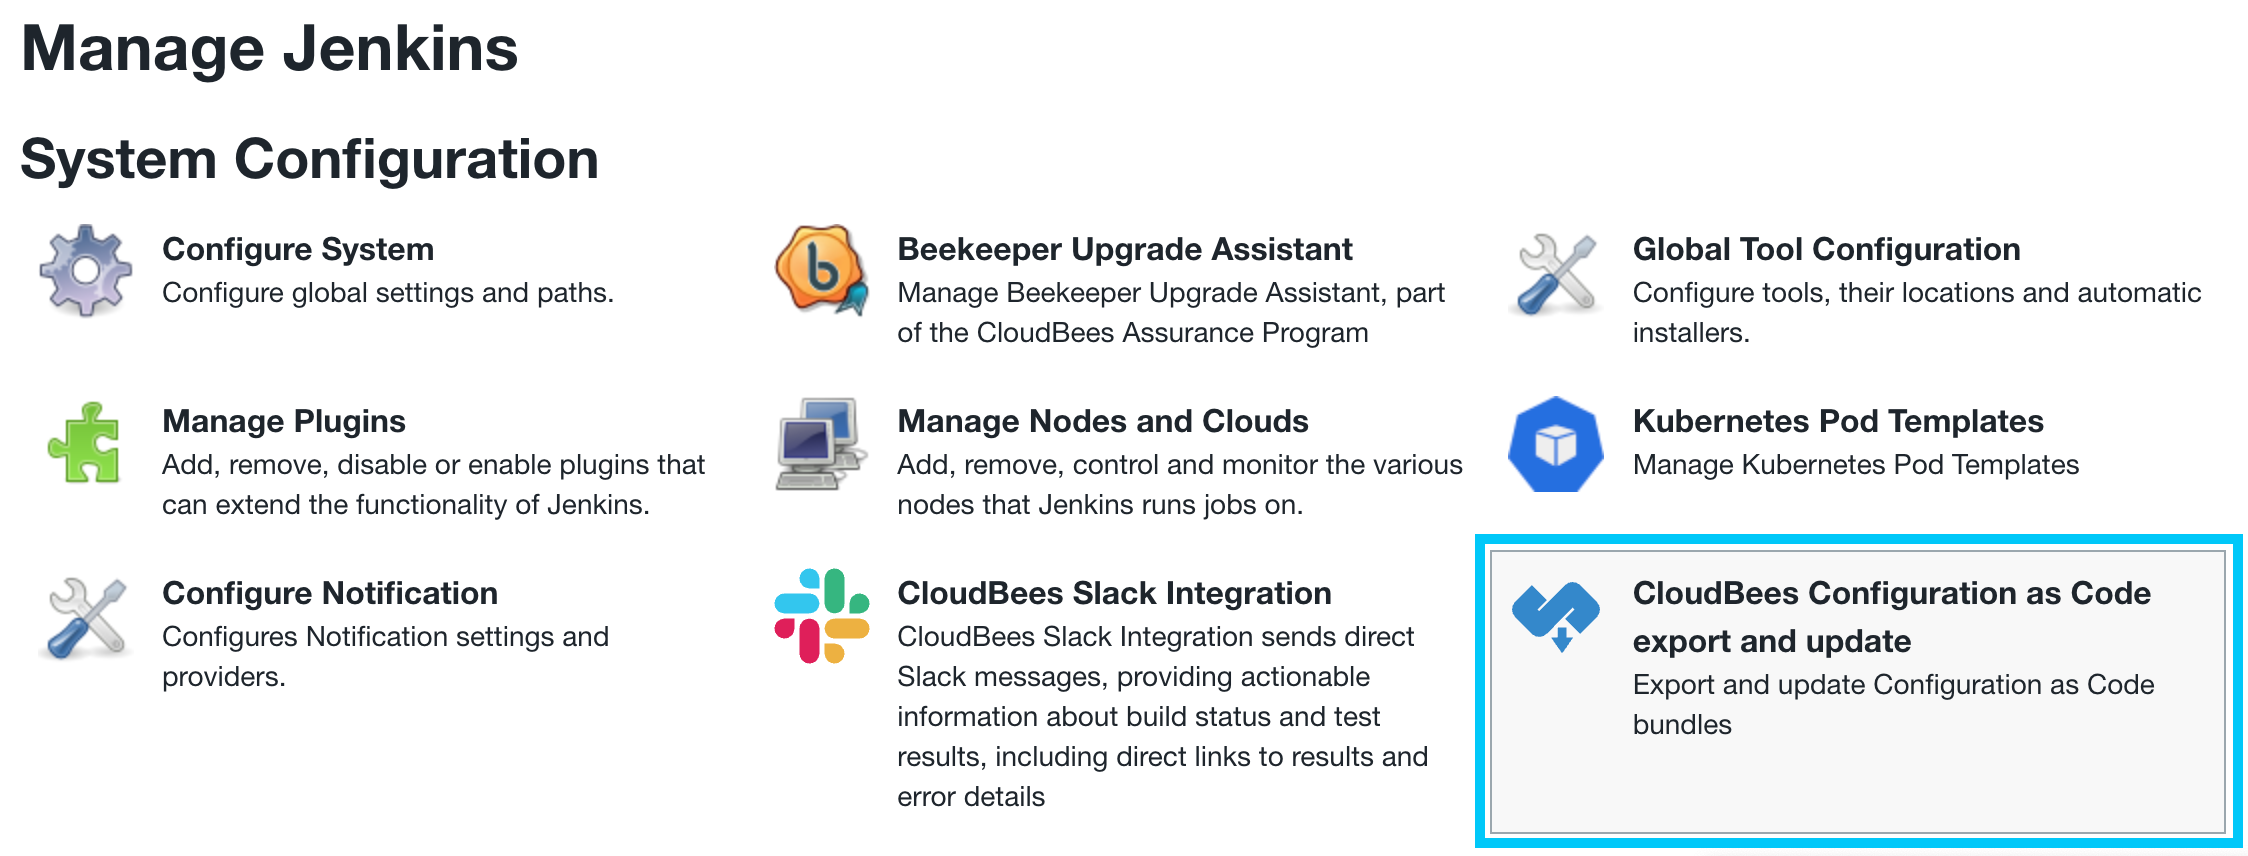
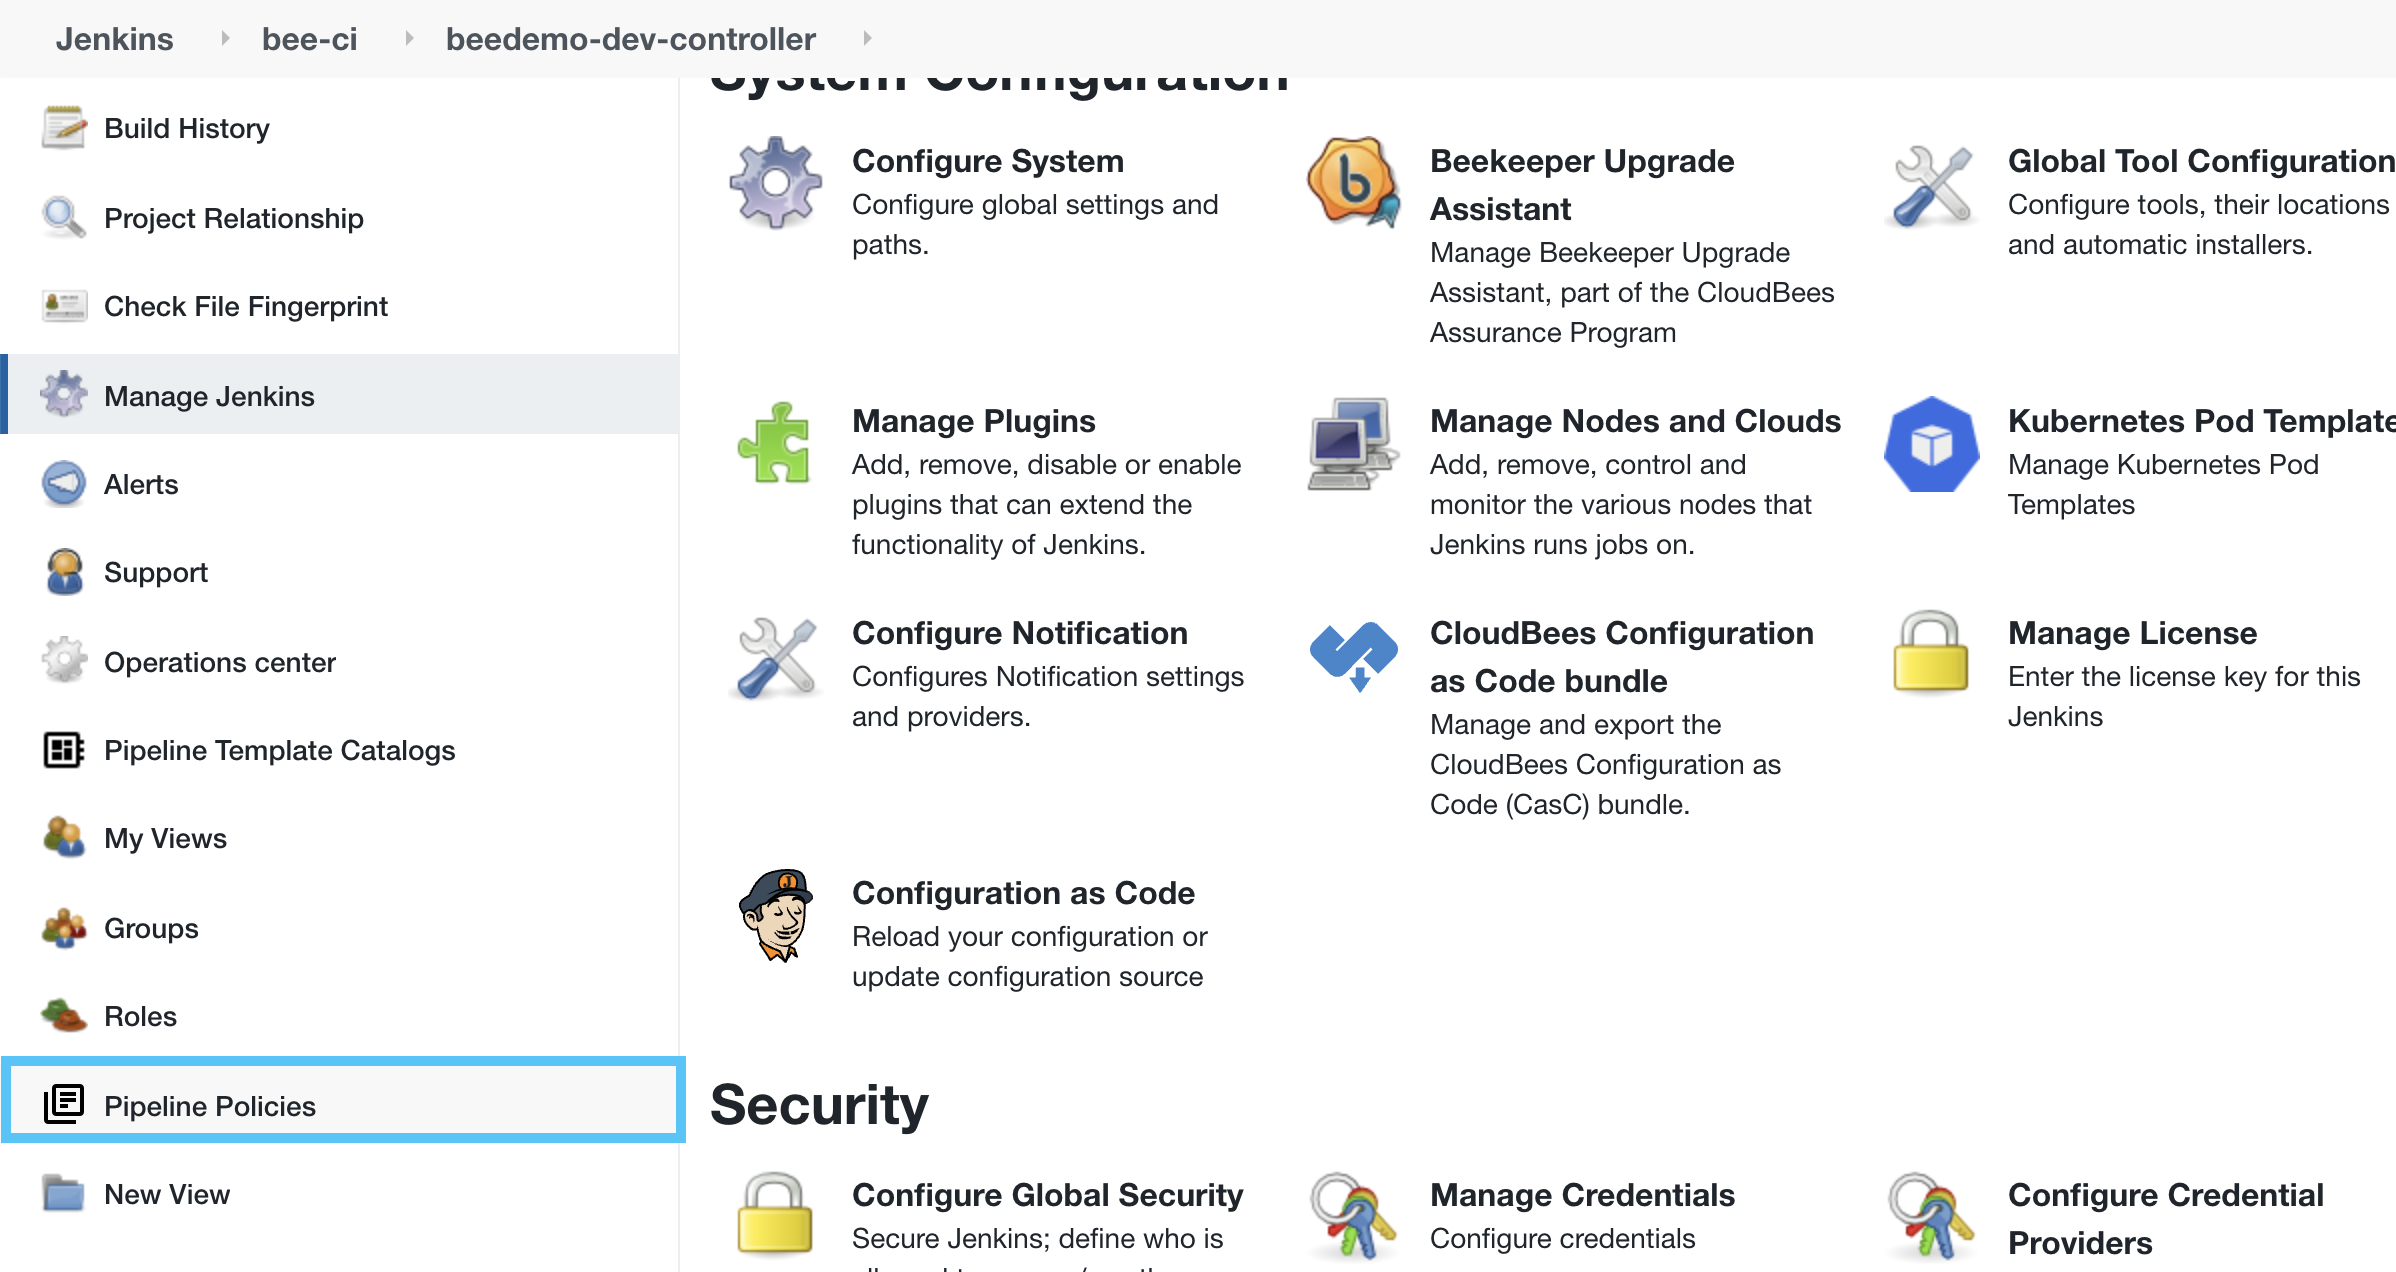
- Click on the Manage Jenkins link in the left navigation menu and then click on the CloudBees Configuration as Code export and update configuration link.
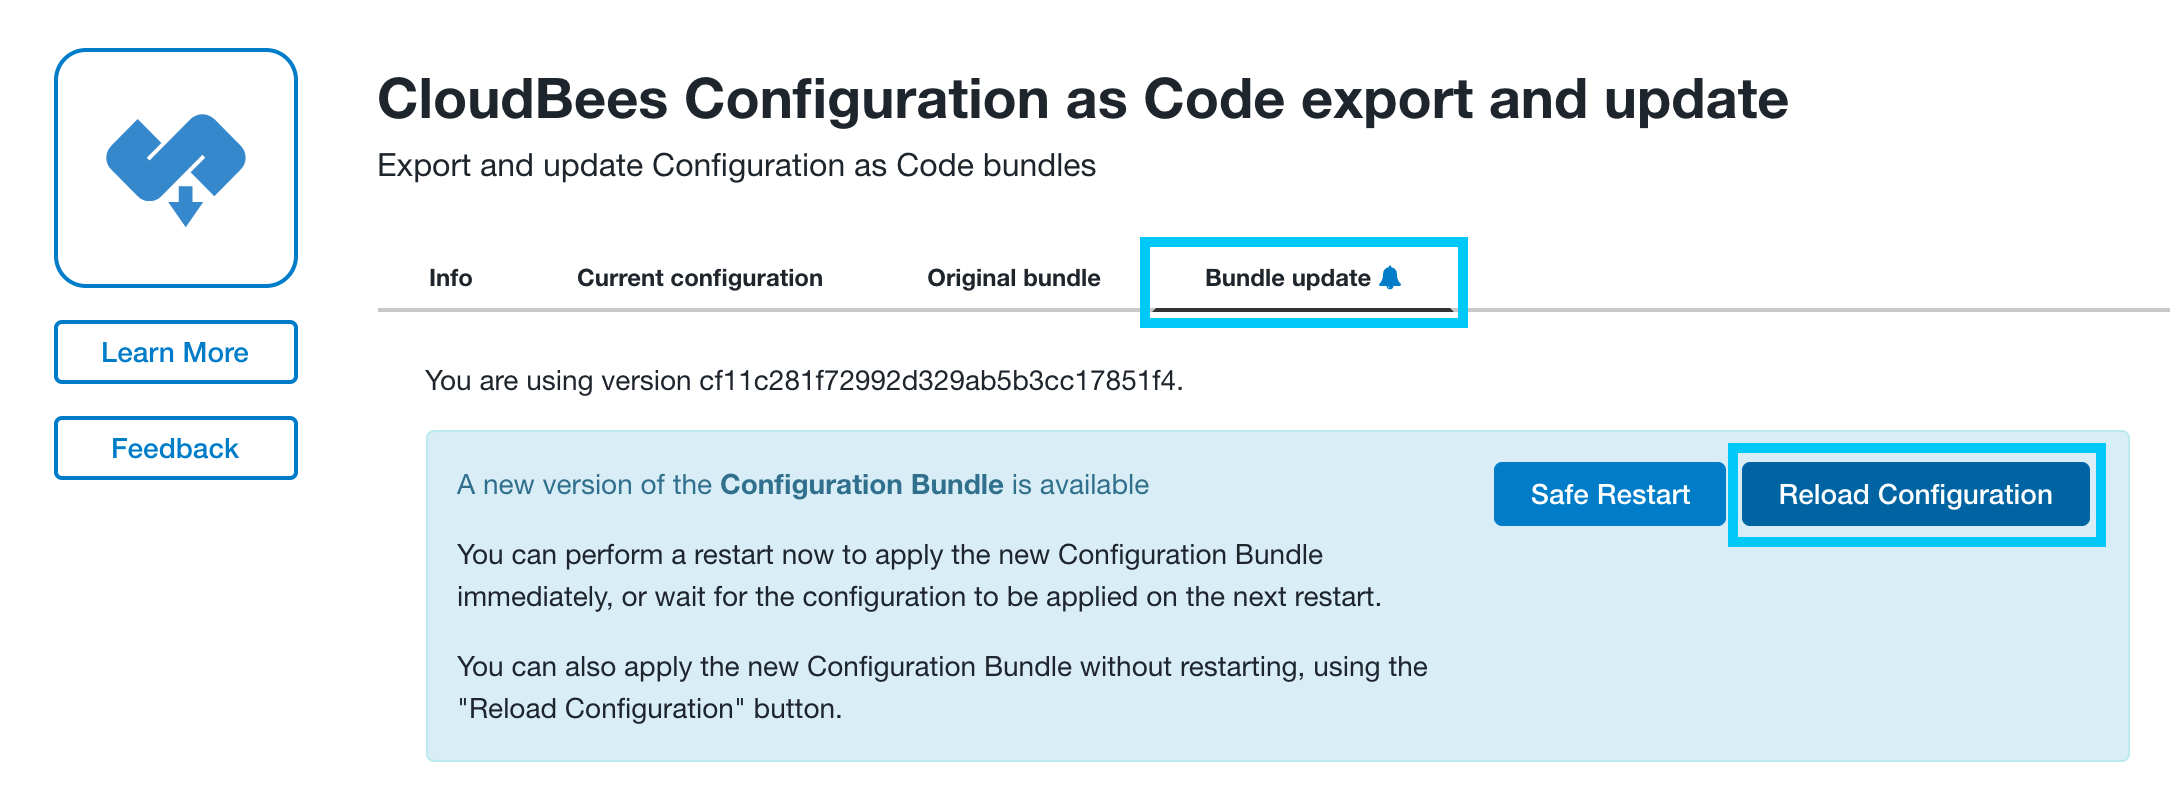
- On the next screen, click on the Bundle Update link and you should see that a new version of the configuration bundle is available. Click the Reload Configuration button and on the next screen click the Yes button to apply the updated configuration bundle.
If you don’t see the new version available then click the Check for Updates button. Remember, the config-bundle-ops pipeline is triggering a job on another controller, so the update won’t be available until that job has completed.
-
After the updated configuration bundle has finished loading, click on the Pipeline Policies link in the left menu.
-
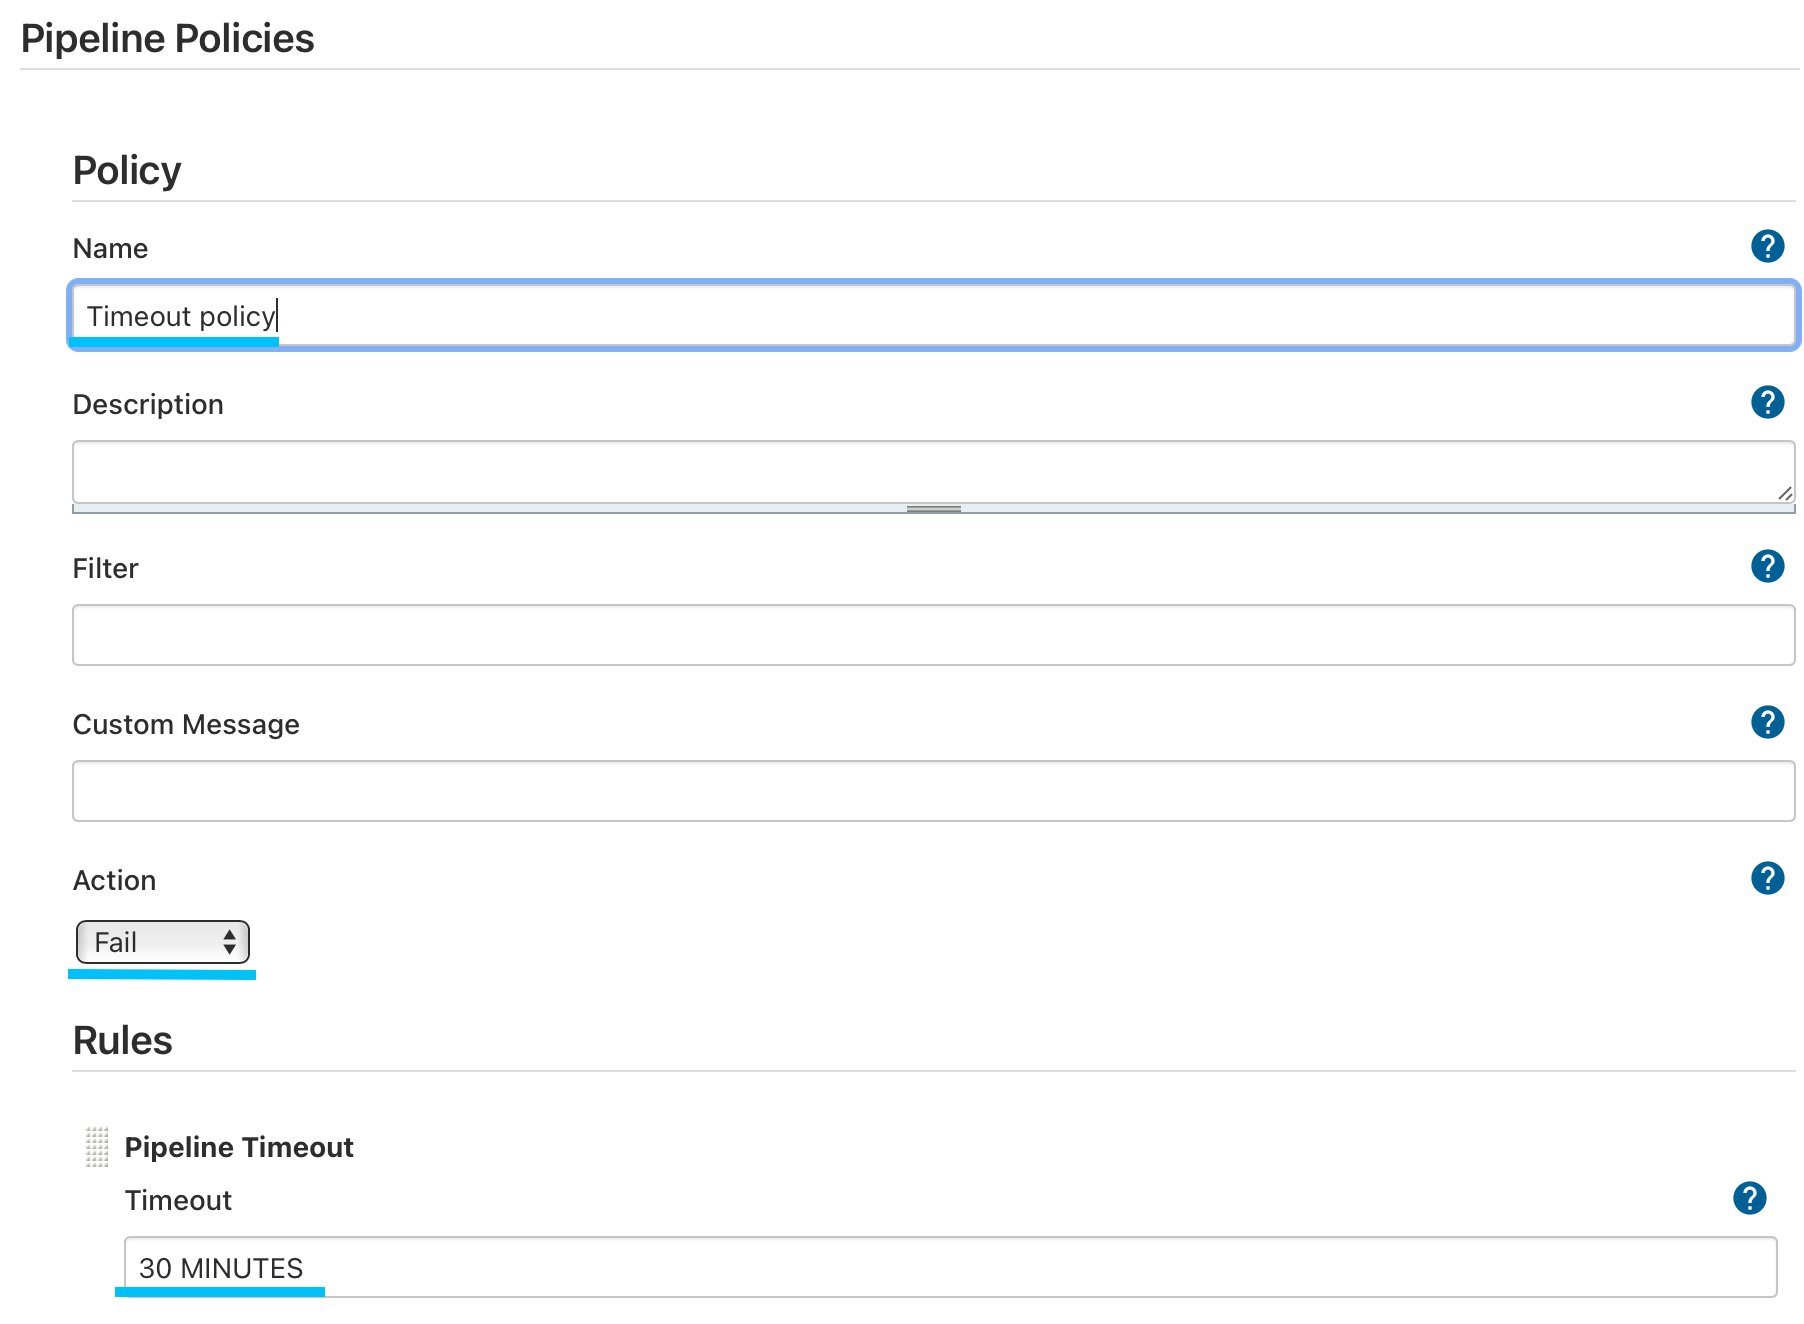
Next, on the Pipeline Policies screen, you will see a policy with the following settings - matching the configuration from the updated CasC bundle:
- Name: Timeout policy
- Action: Fail
- A Rule with a Pipeline Timeout of 30 MINUTES
-
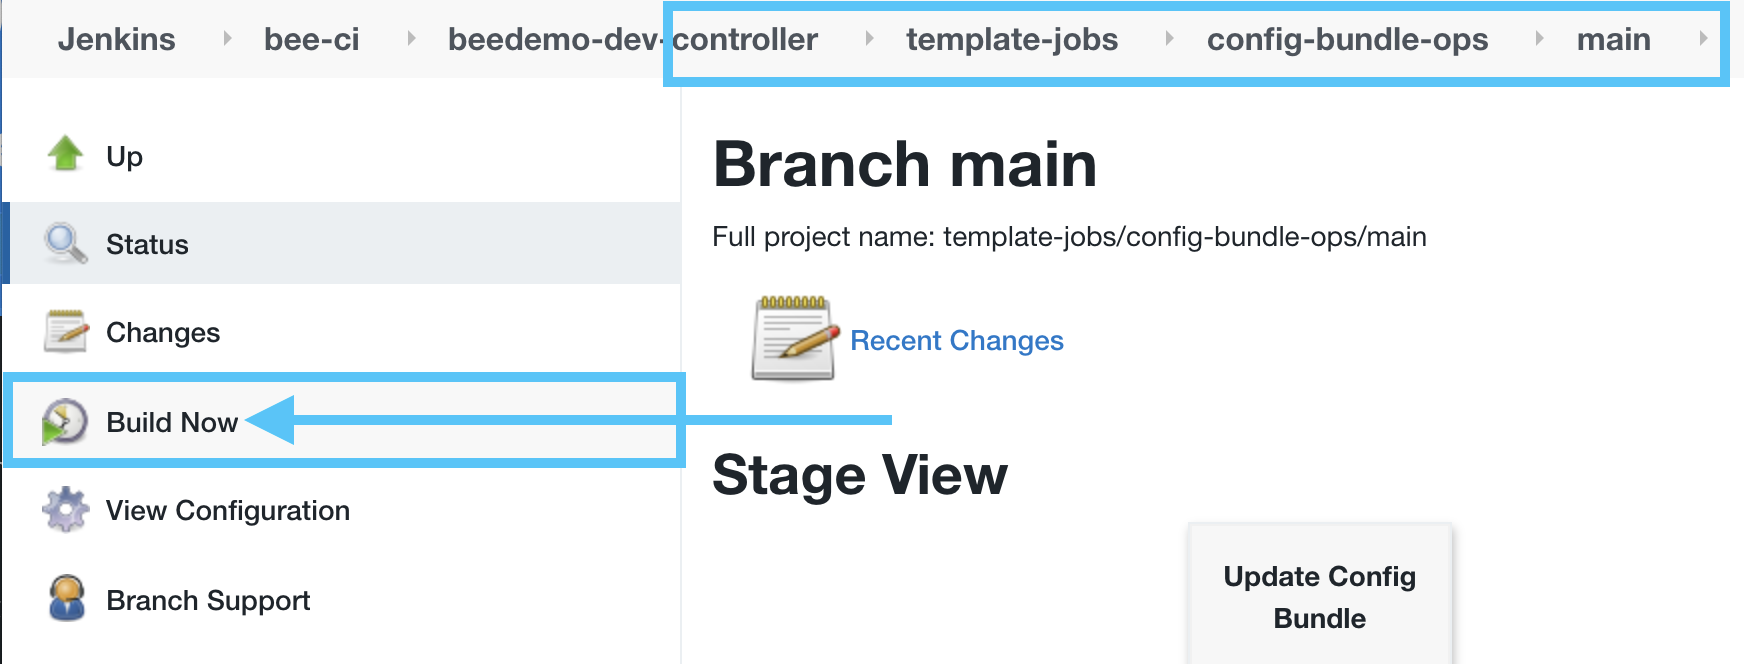
Navigate to the config-bundle-ops Mutlibranch project in the template-jobs folder, click on the main branch job and then click the Build Now link in the left menu.
-
Navigate to the logs for that build and you will see that the build failed due to Validation Errors.

-
To fix this we will have to once again update the
Jenkinsfileof the CloudBees CI Configuration Bundle template in your copy of thepipeline-template-catalogrepository - remember, even though we are building from thecloudbees-ci-config-bundlerepository, theJenkinsfileis actually coming from the CloudBees CI Configuration Bundle template. Navigate to thatJenkinsfileand click the pencil icon to open it in the GitHub file editor.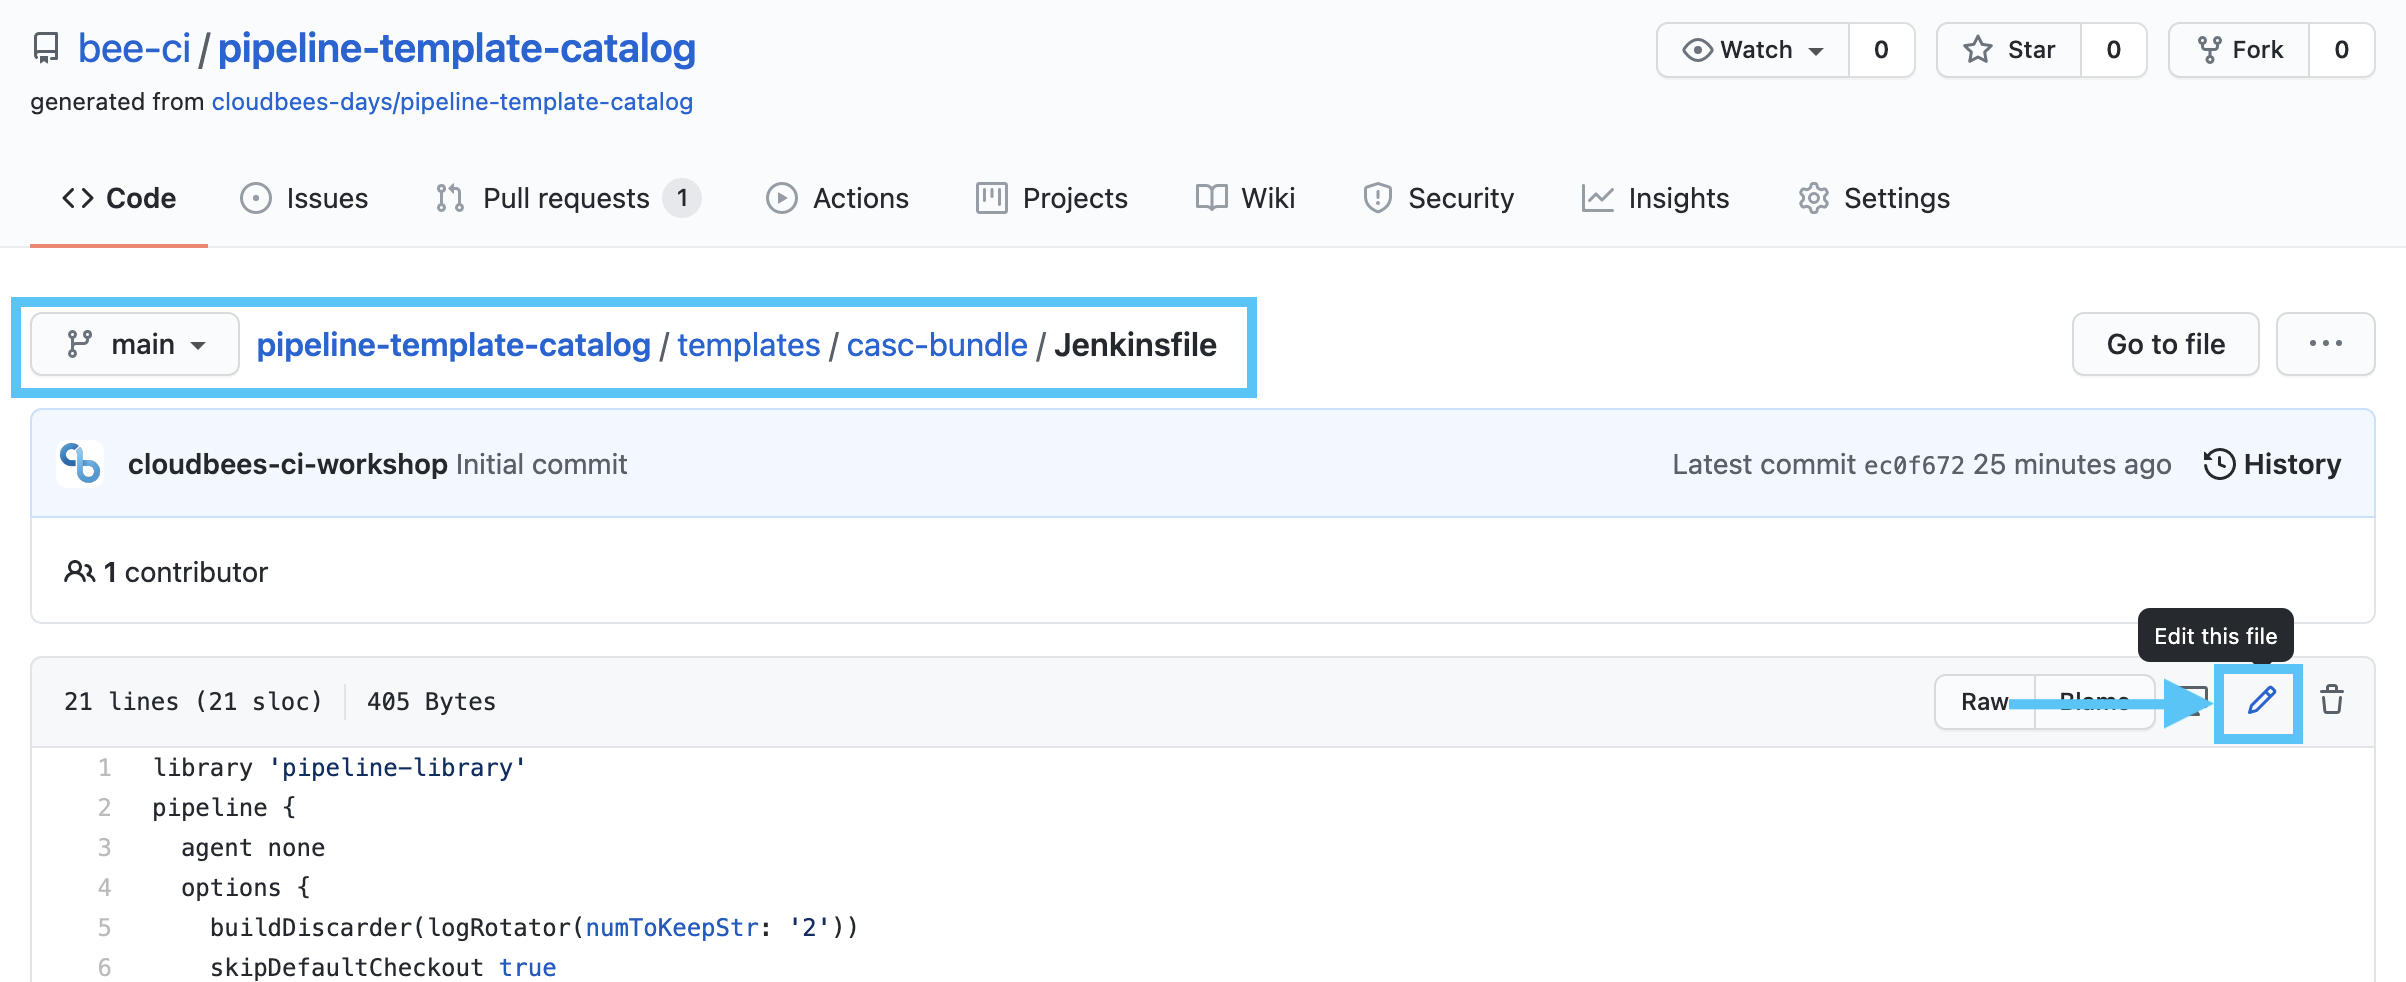
-
In the GitHub file editor, change the
timevalue of thetimeoutpipelineoptionfrom60to10(it needs to be 30 minutes or less to successfully validate against the Timeout policy) and then click the Commit changes (directly to themainbranch) button to commit the updatedJenkinsfileto your main branch.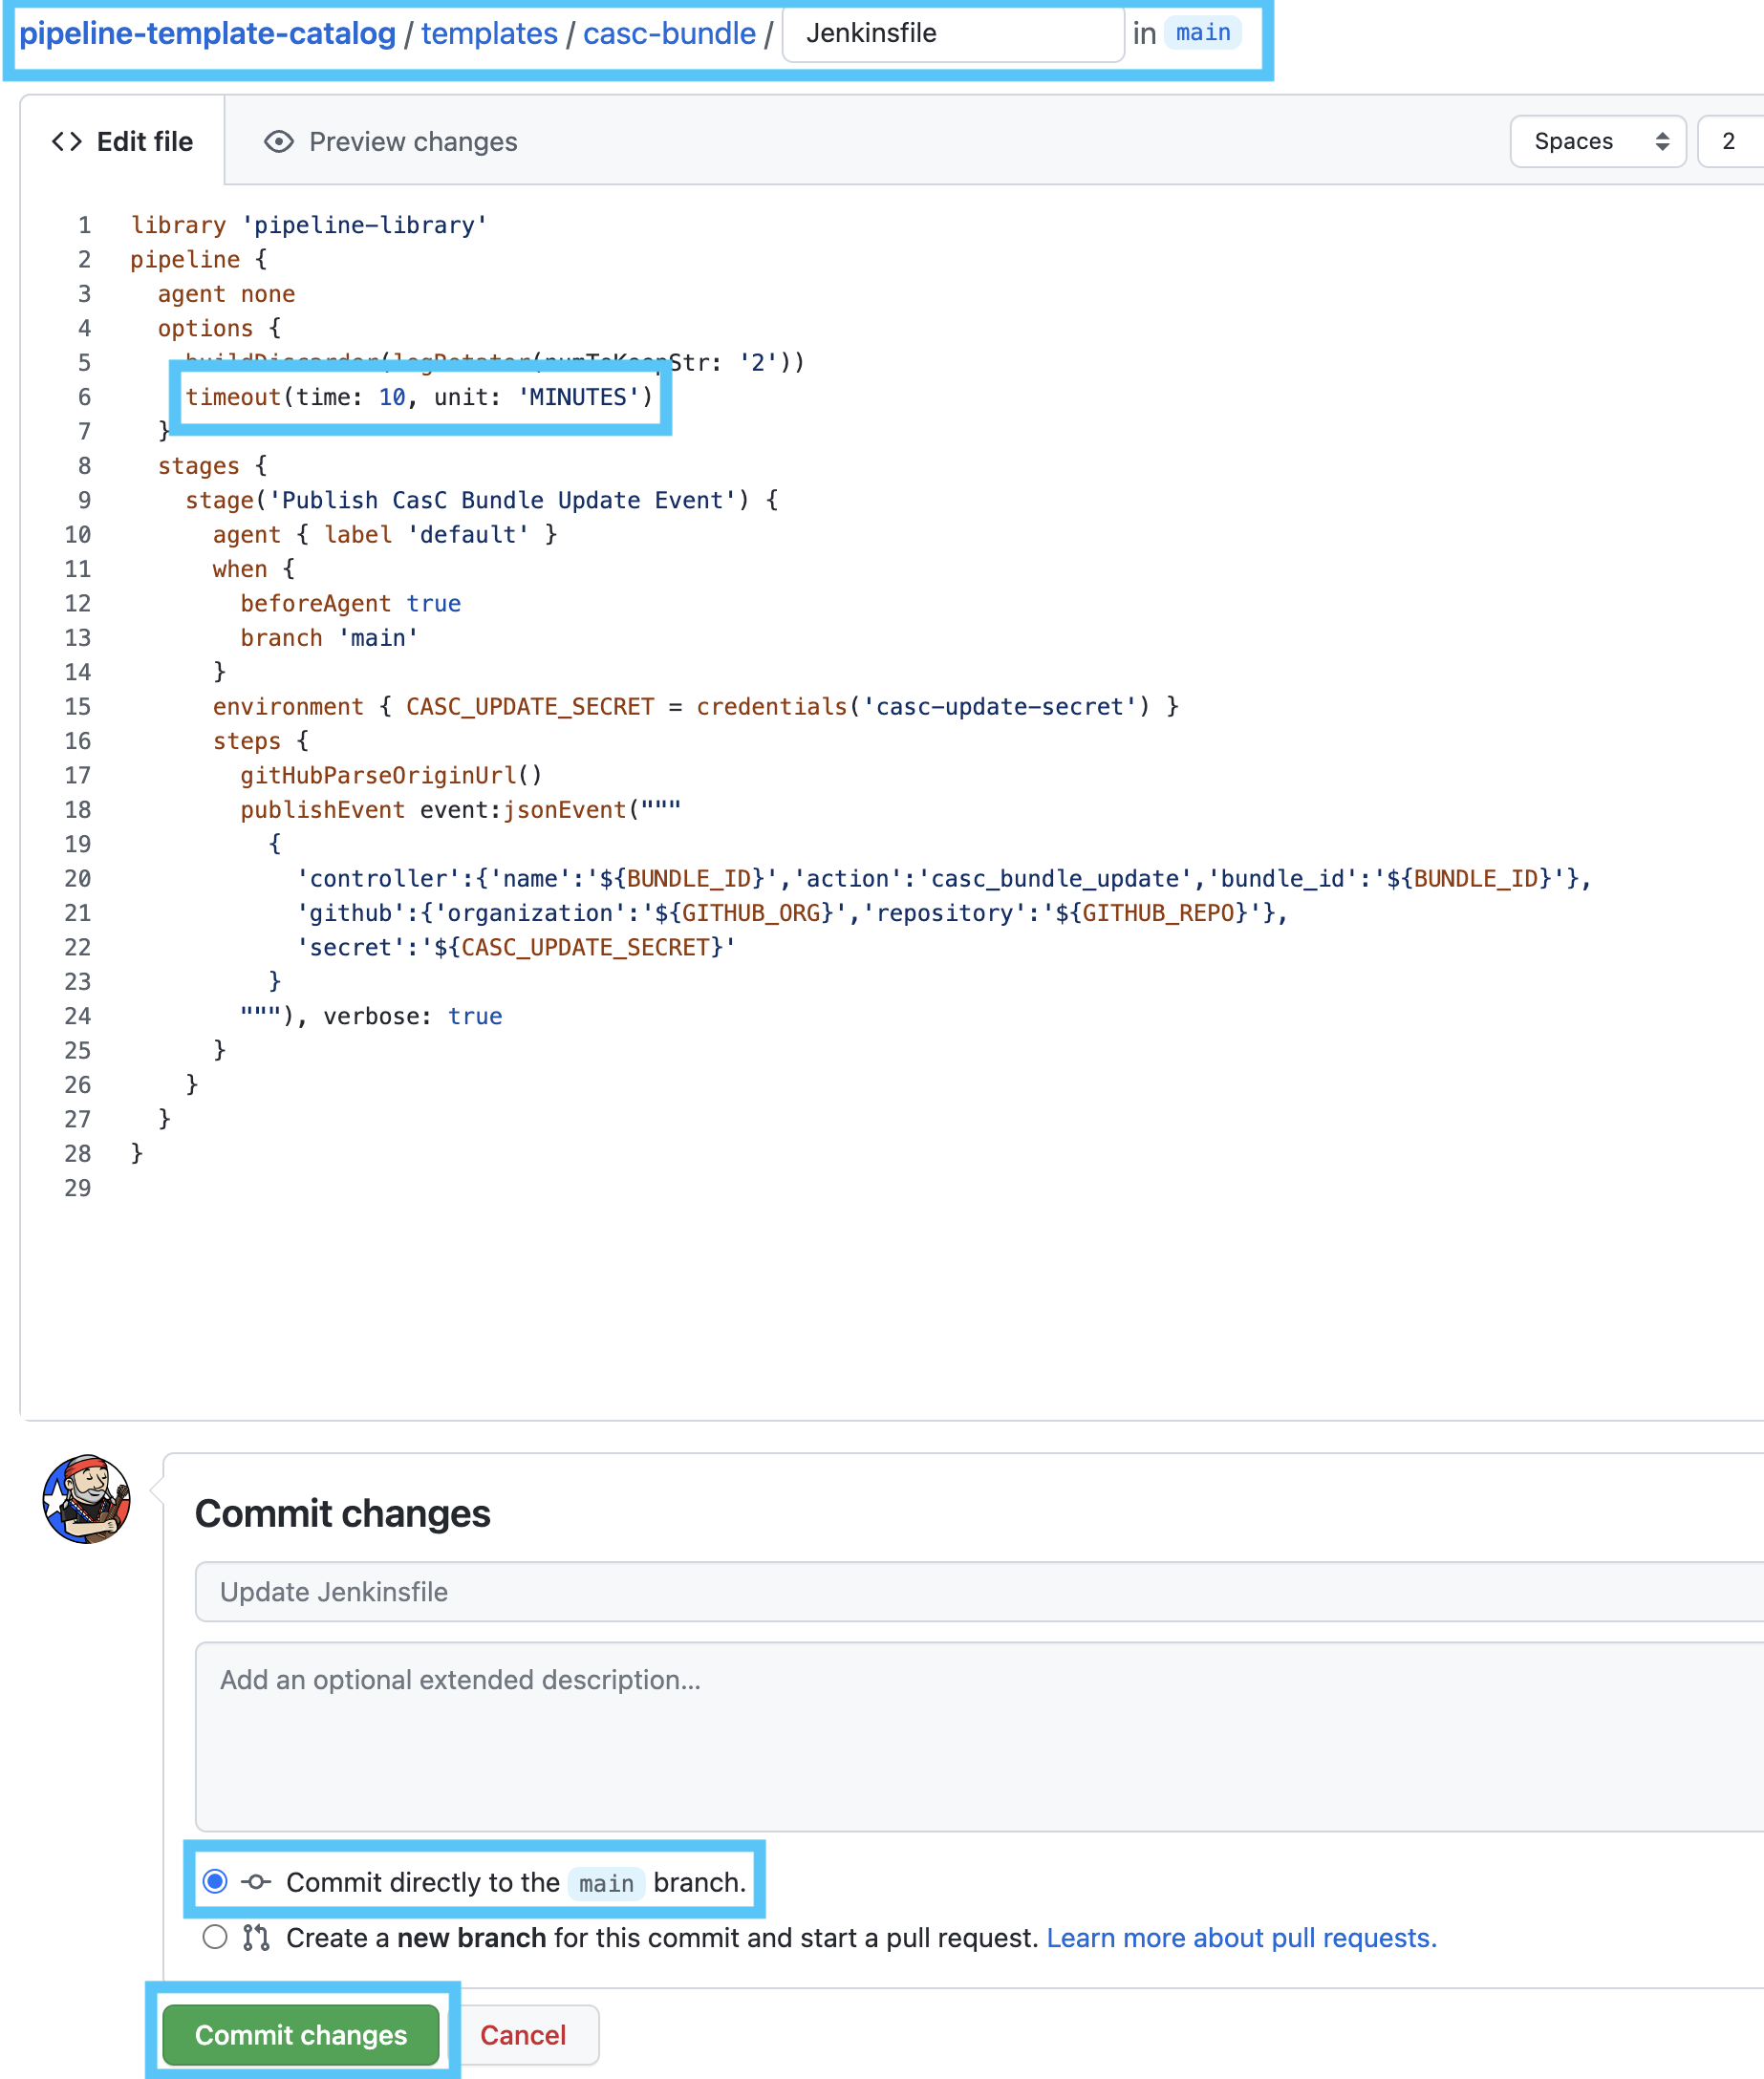
-
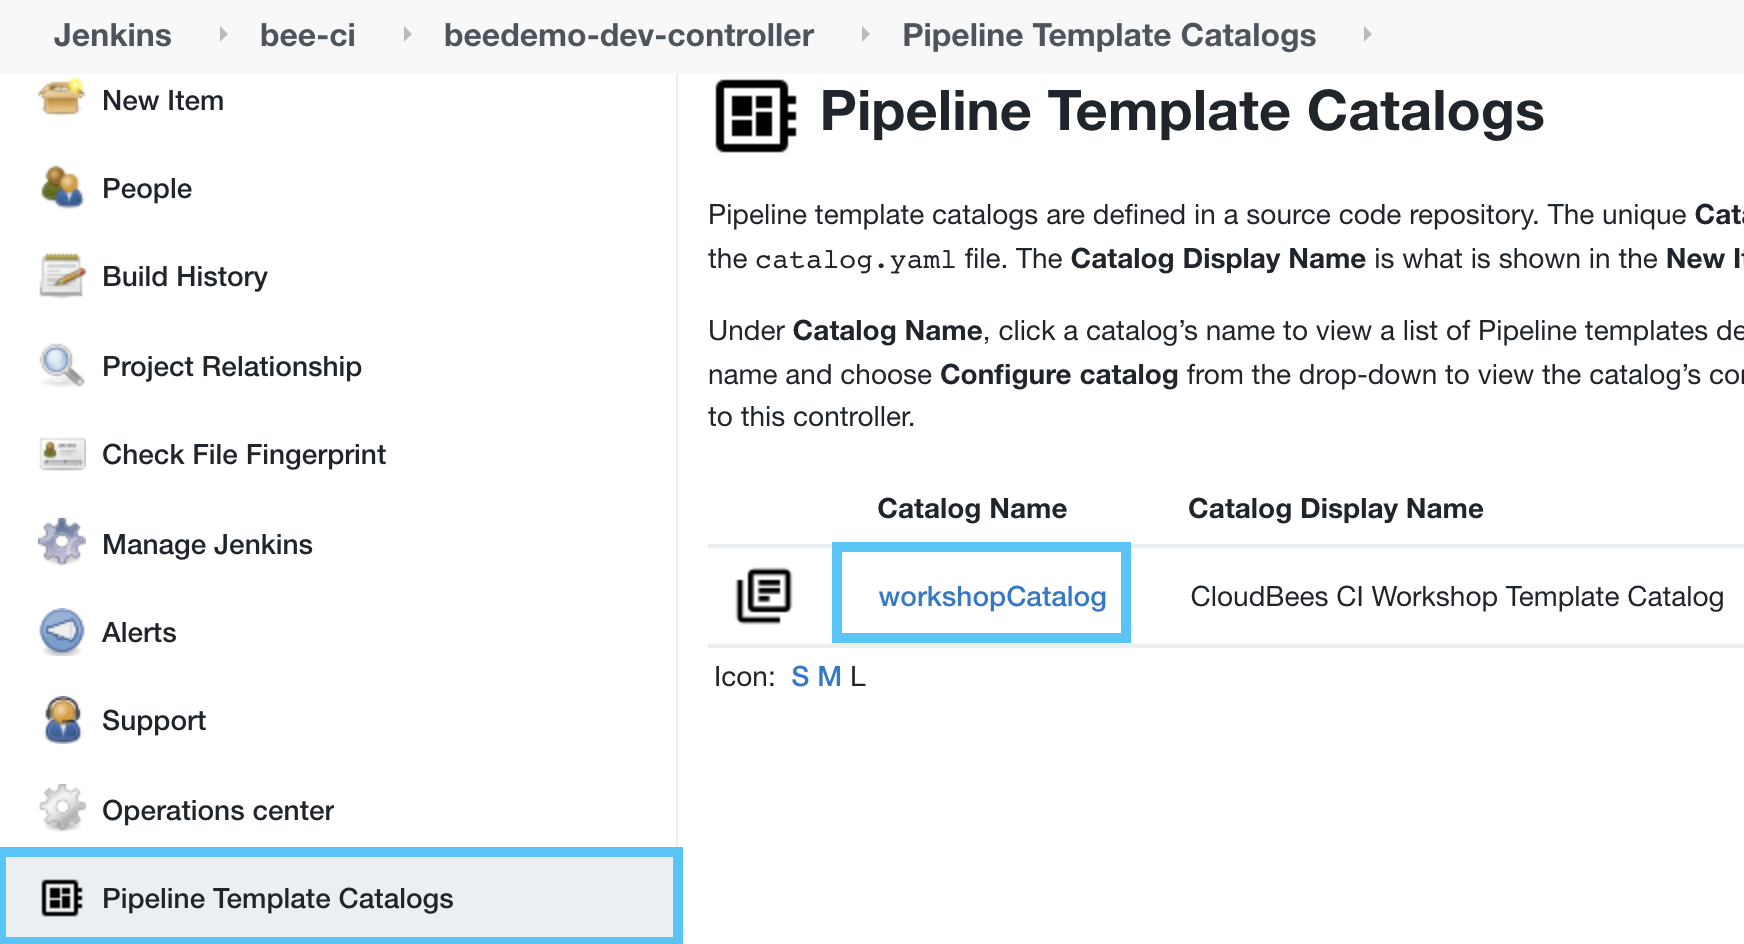
Next, to ensure that we are using the updated CloudBees CI Configuration Bundle template, we will check the Pipeline Template Catalog Import Log. Navigate to the top-level of your CloudBees CI managed controller and click on Pipeline Template Catalogs link in the left menu and then click the workshopCatalog link.
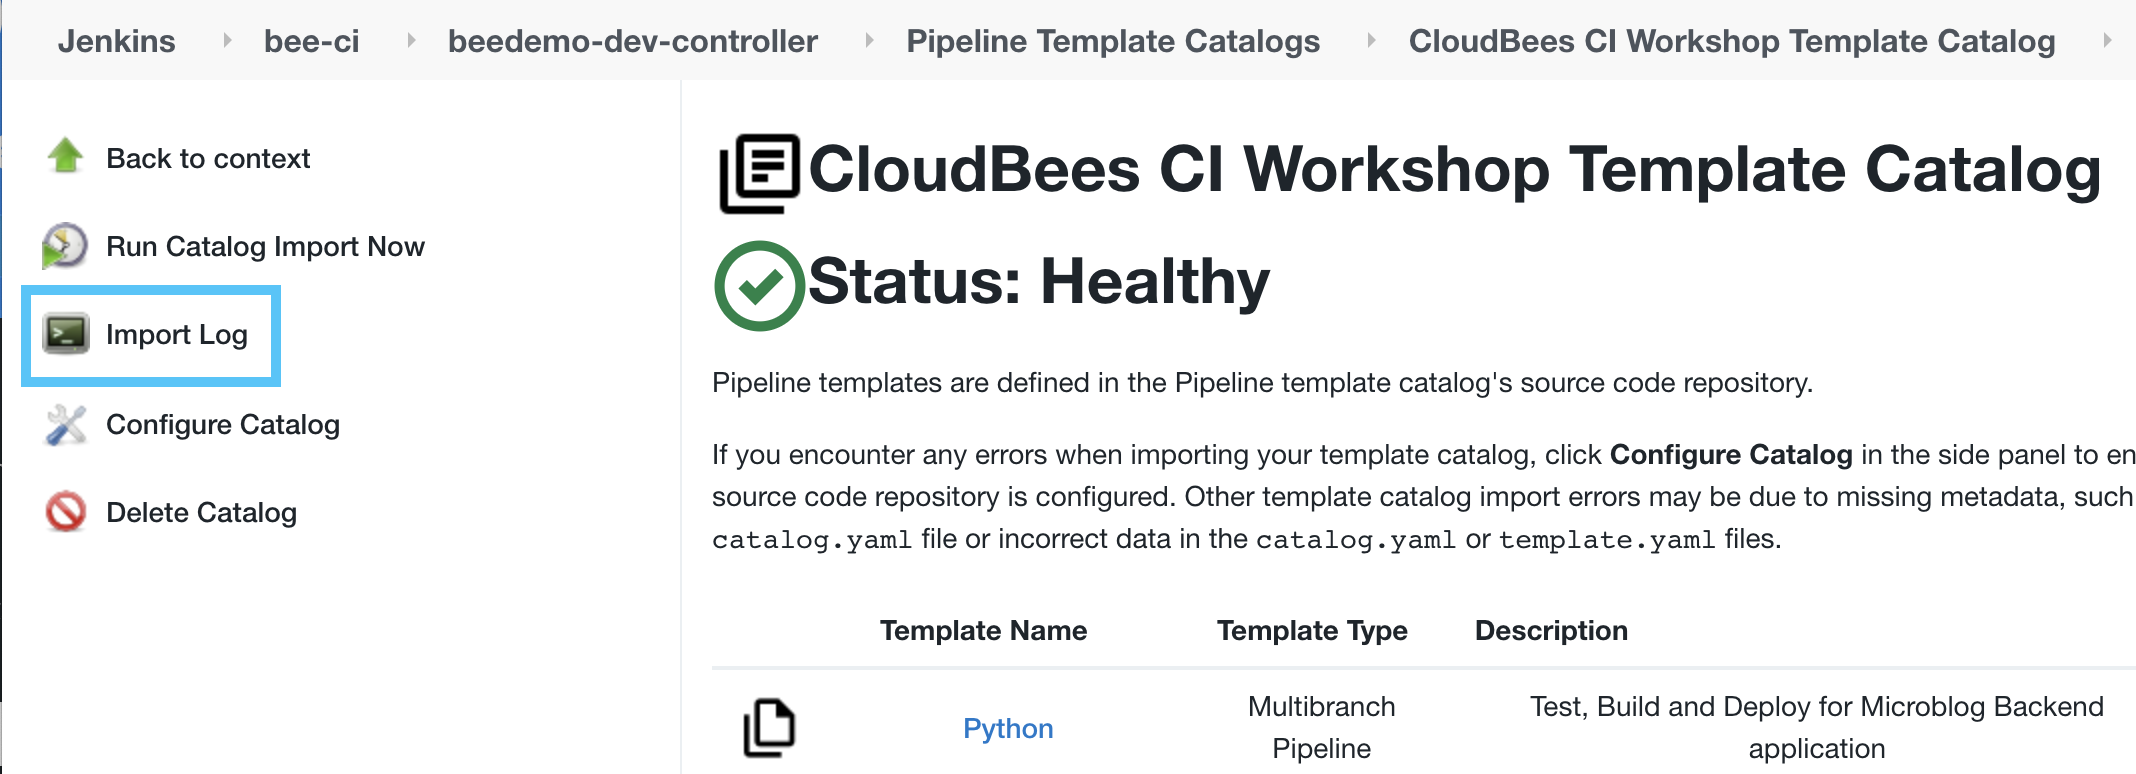
Merging the updated Jenkinsfile for that template will trigger a GitHub webhook resulting in a re-import of the CloudBees CI Workshop Template Catalog.
- On the next screen, click the Import Log link to ensure the catalog was imported successfully and recently.
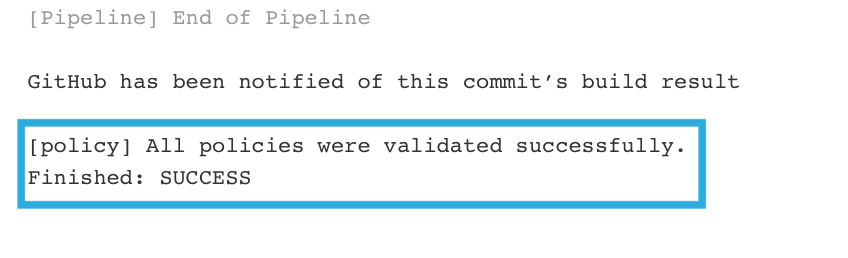
- After the import is complete, navigate back to the main branch job in the config-bundle-ops Mutlibranch project in the template-jobs folder and click the Build Now link in the left menu. The build will complete successfully and the logs for that build will show that the Pipeline policy validated successfully.
For instructor led workshops please return to the workshop slides