CloudBees CI Configuration as Code for Developers
As a developer you may (and shouldn’t) have access to make configuration changes to your team’s CloudBees CI managed controller (Jenkins instance). However, developers can take advantage of the GitOps approach to managing the configuration of a CloudBees CI managed controller by requesting configuration changes via GitHub pull requests.
In this lab you will act as developer and CloudBees CI admin, where you will review and merge a pull request to your cloudbees-ci-config-bundle repository in your workshop GitHub Organization and then the CasC bundle will be updated and automatically reloaded by the config-bundle-ops job on your managed controller. But before the bundle is automatically updated, we must put on our Jenkins admin hat and update the CloudBees CI Configuration Bundle Pipeline template.
Update the CasC Update Template to Automatically Reload Configuration
- Navigate to your copy of the
pipeline-template-catalogrepository in your workshop GitHub Organization, open theJenkinsfilefor the CloudBees CI Configuration Bundle Pipeline Catalog template in thetemplates/casc-bundle/directory and click on the pencil button to edit.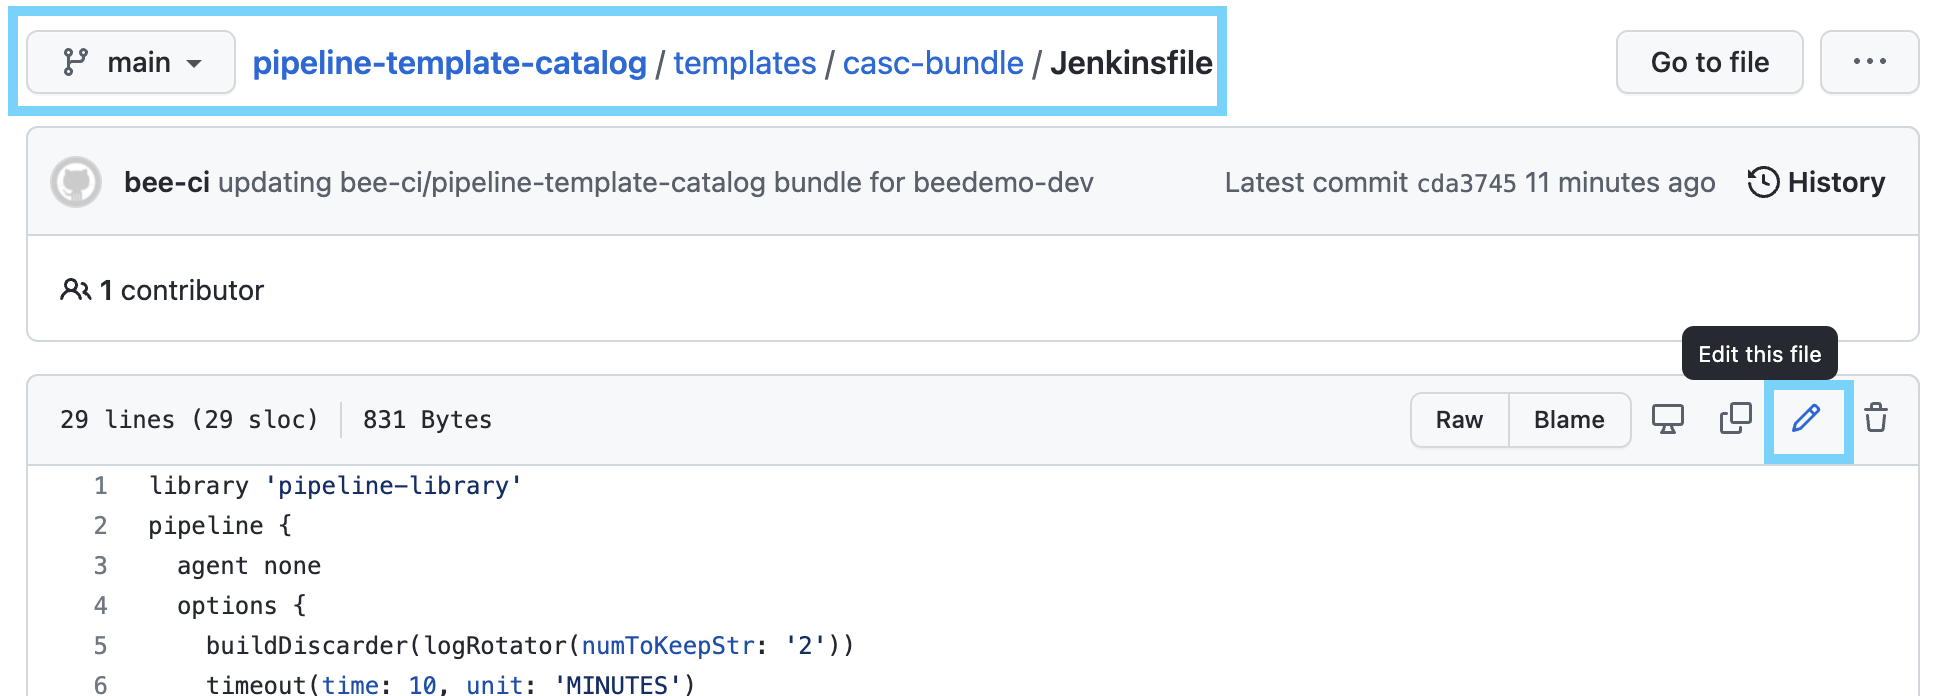
- We are triggering another job with a notification event to have it actually copy the updated configuration files to Operations Center, so we can’t automatically reload the configuration until it has been updated. Luckily the downstream job is configured to automatically reload the bundle on your controller by passing
'casc':{'auto_reload':'true'}in thejsonEventof thepublishEvent. So to automatically reload the bundle for your controller, update theJenkinsfileto match the following:
library 'pipeline-library'
pipeline {
  agent none
  options {
    buildDiscarder(logRotator(numToKeepStr: '2'))
    timeout(time: 10, unit: 'MINUTES')
  }
  stages {
    stage('Publish CasC Bundle Update Event') {
      agent { label 'default' }
      when {
        beforeAgent true
        branch 'main'
      }
      environment { CASC_UPDATE_SECRET = credentials('casc-update-secret') }
      steps {
        gitHubParseOriginUrl()
        publishEvent event:jsonEvent("""
          {
            'controller':{'name':'${BUNDLE_ID}','action':'casc_bundle_update','bundle_id':'${BUNDLE_ID}'},
            'github':{'organization':'${GITHUB_ORG}','repository':'${GITHUB_REPO}'},
            'secret':'${CASC_UPDATE_SECRET}',
            'casc':{'auto_reload':'true'}
          }
        """), verbose: true
      }
    }
  }
}
- Finally, click on the Commit changes button to commit to the
mainbranch.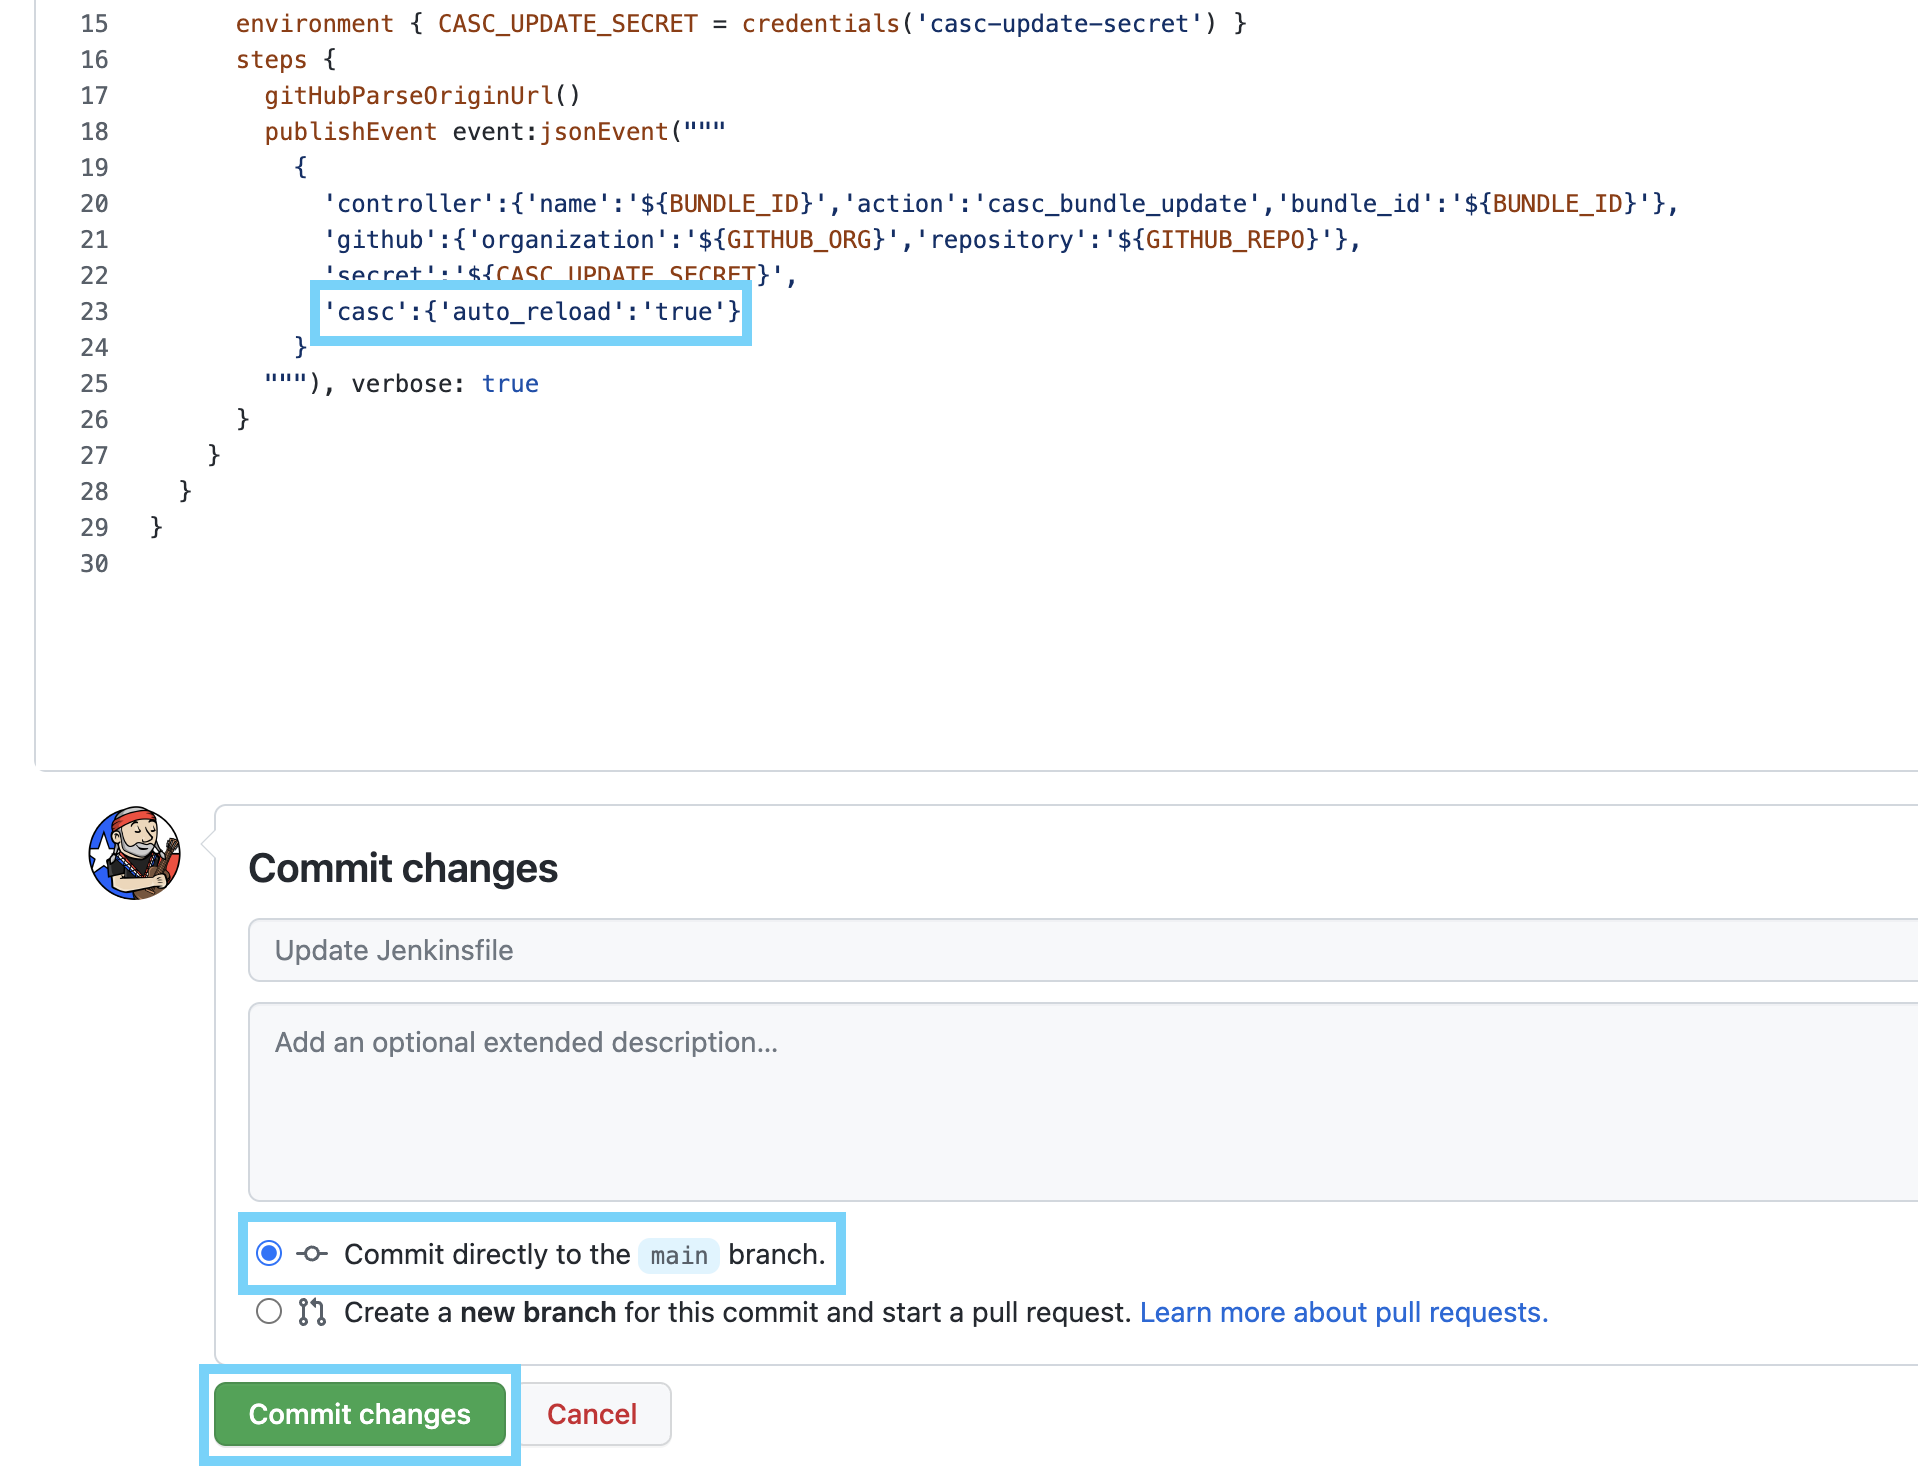
Add Slack Integration via CasC
Please ensure that you have signed up for the CloudBees Workshops Slack workspace as instructed in the Pre-Workshop Setup before continuing with this lab.
- Navigate to your
cloudbees-ci-config-bundlerepository in GitHub and click on the Pull requests link.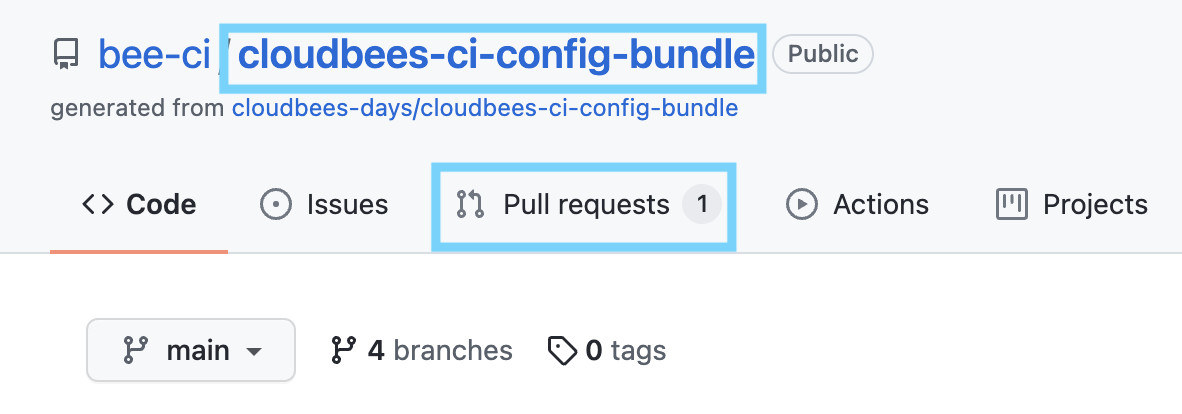
- On the next screen, click on the CasC for Devs lab updates pull request and then click on the Files changed tab to review the requested configuration changes. As you can see, we are adding the
cloudbees-slackplugin andcloudbees-slack-integrationconfiguration for your CloudBees CI user.
- On the Files changed screen click on the 3 dots to the right of the
jenkins.yamlfile name to edit the file.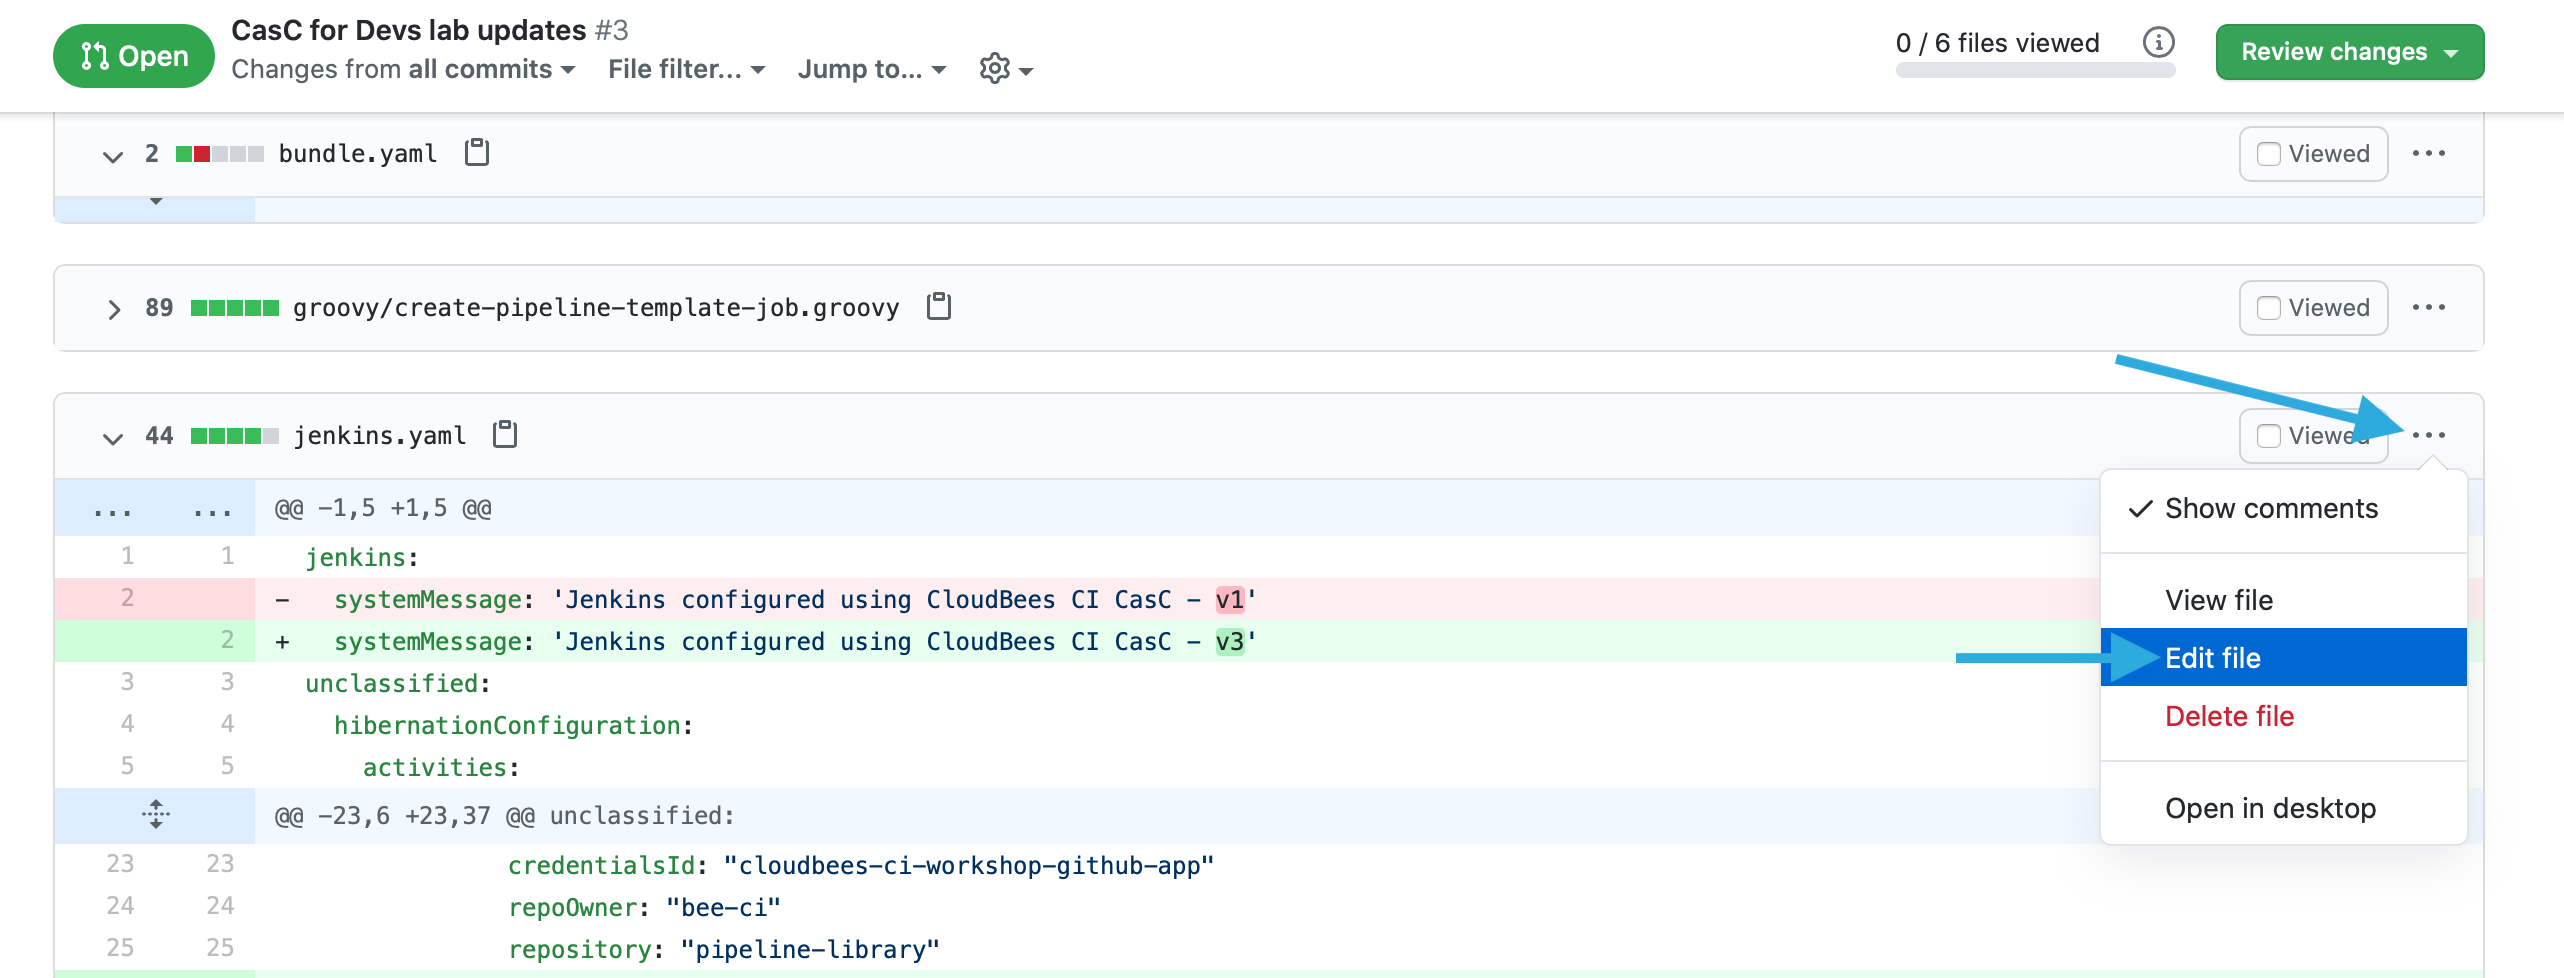
- Update the value of the
slackparameter to match the email you used to sign up to the CloudBees Workshops Slack workspace in the Pre-Workshop Setup, then scroll down to Commit changes, ensure that “Commit directly to thedev-casc-labbranch” is selected and click the Commit changes button.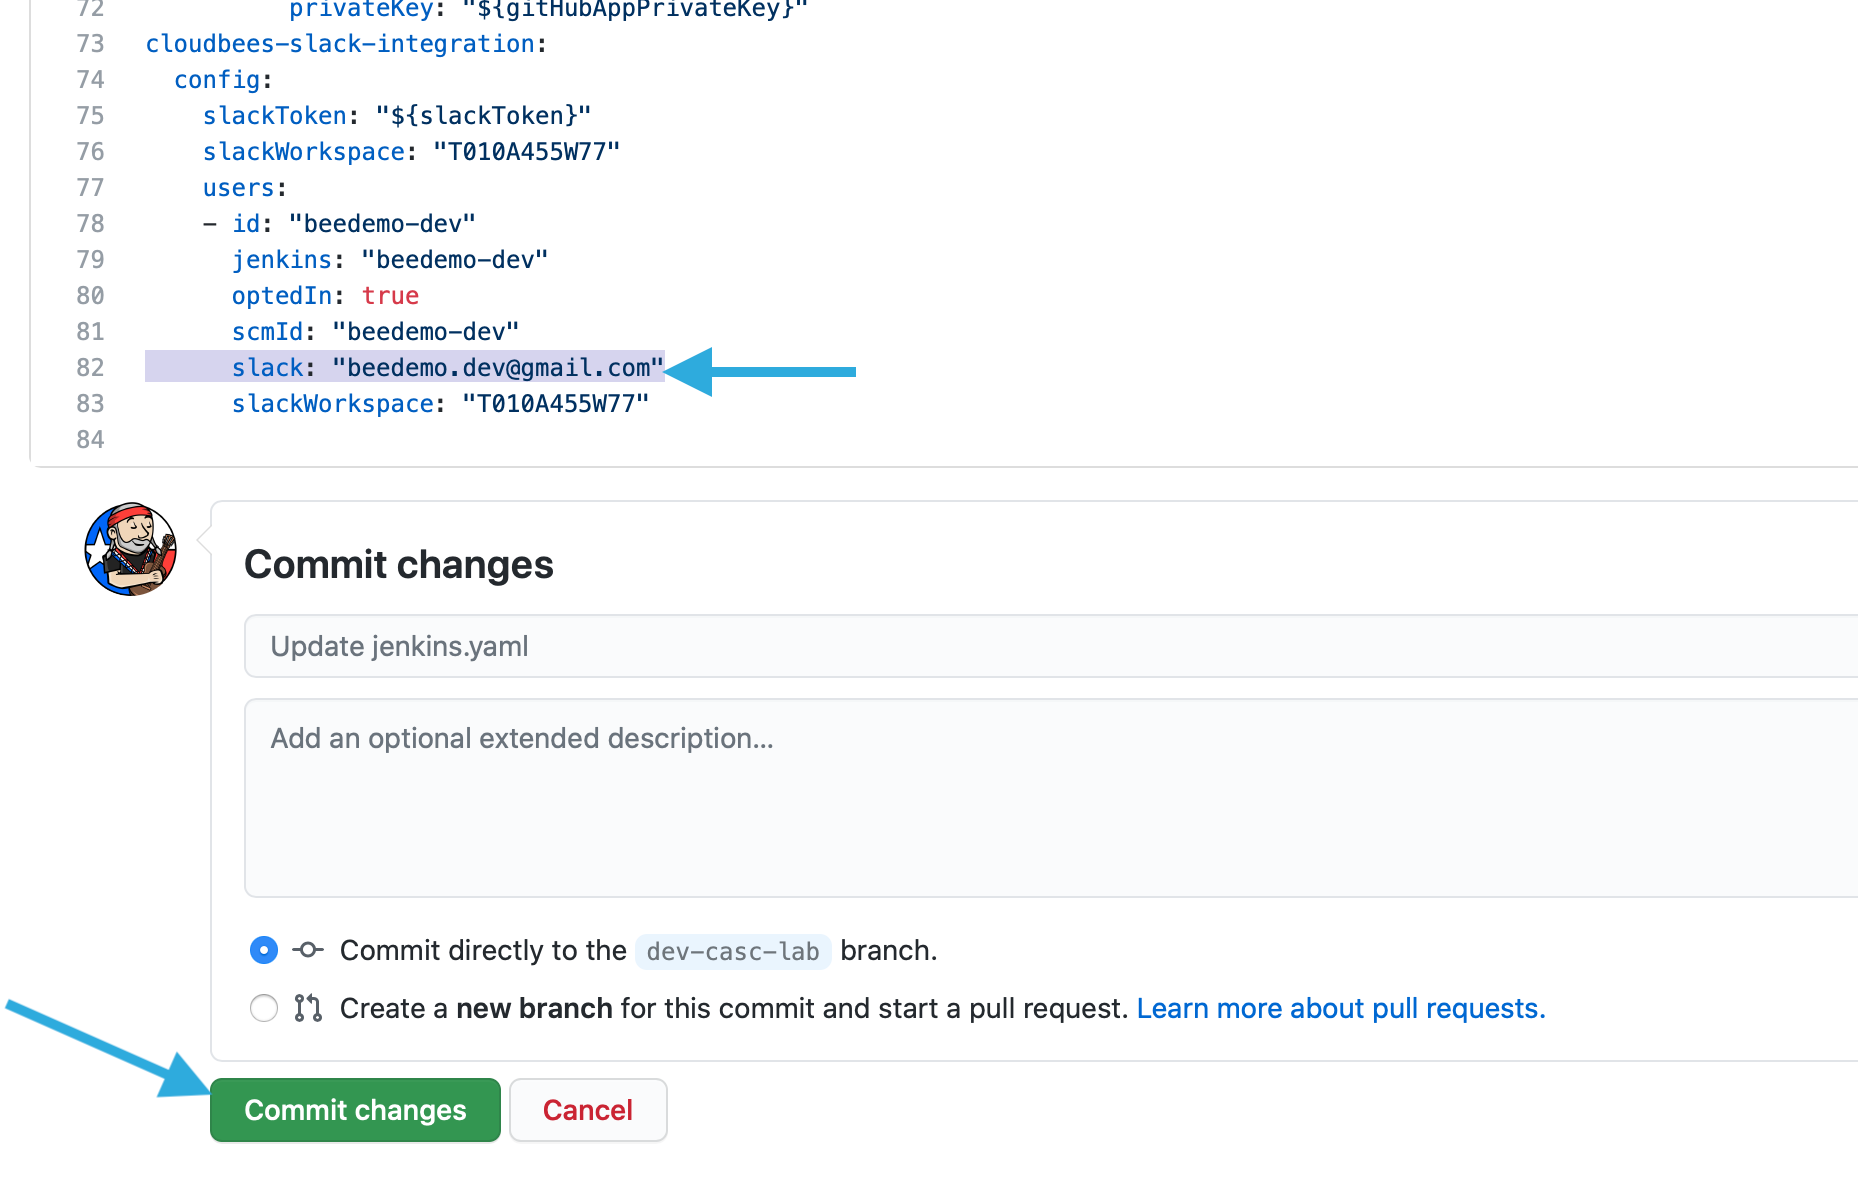
- Once you have reviewed the change, click on the Conversation tab, scroll down and click the green Merge pull request button and then the Confirm merge button.
- Navigate to the config-bundle-ops job under the template-jobs folder on your CloudBees CI managed controller. Shortly after the main branch job completes successfully, navigate to the top-level of your managed controller, click on the Manage Jenkins link in the left navigation menu.
- The updated CasC bundle for your CloudBees CI managed controller installed the
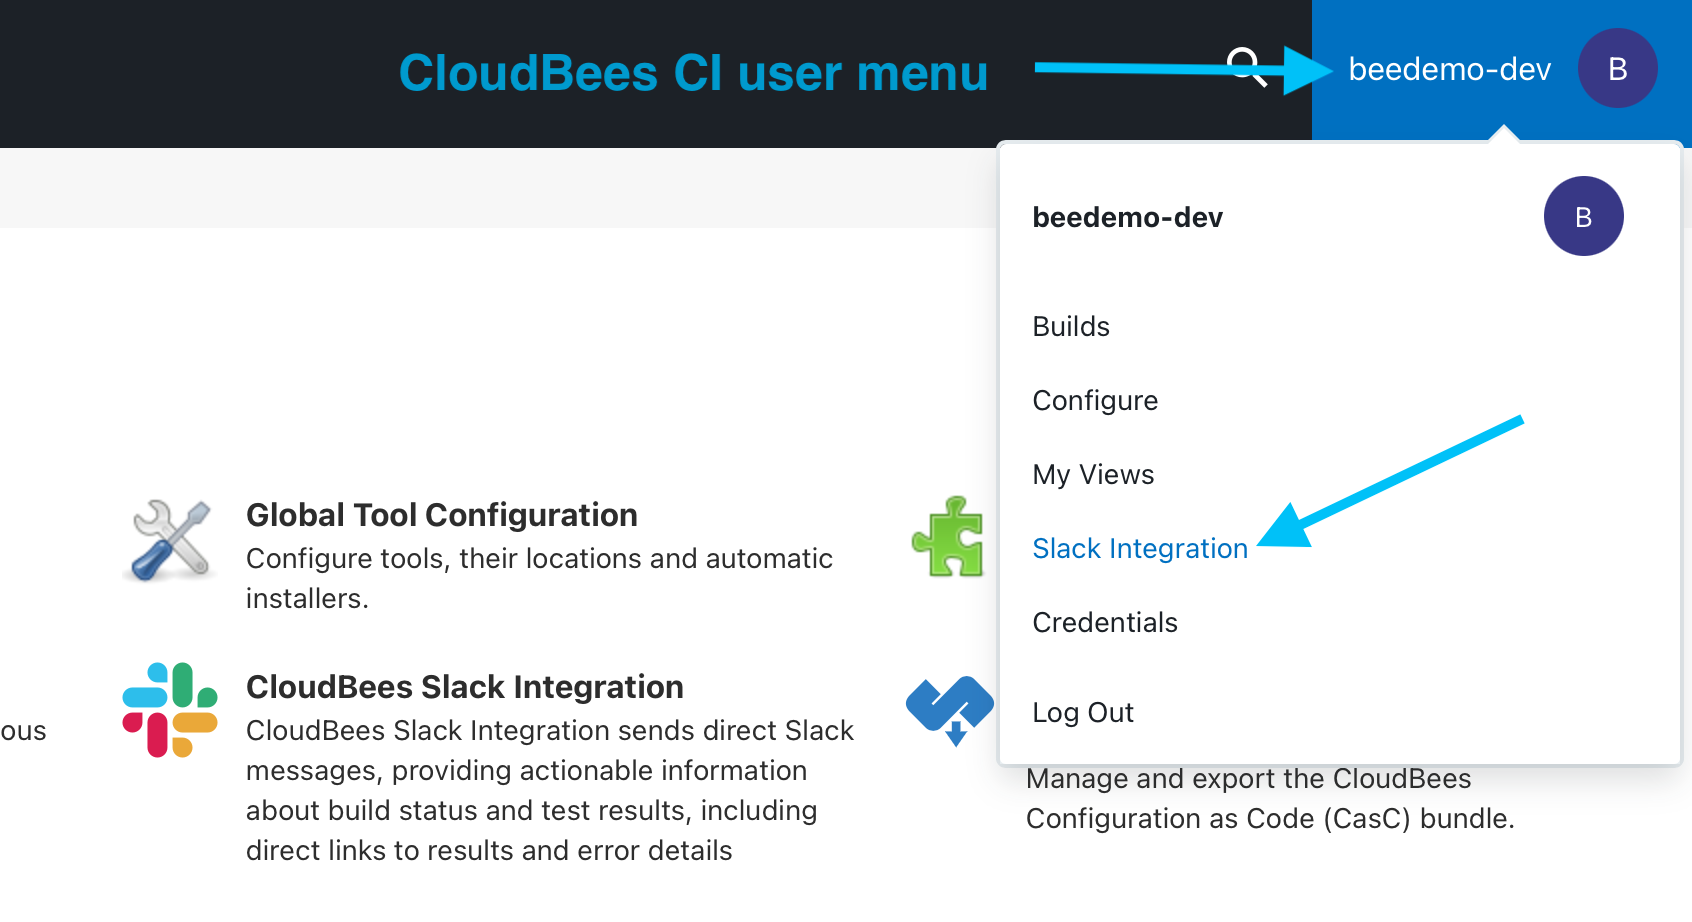
cloudbees-slackplugin and updated the configuration to match what is in themainbranch of youcloudbees-ci-config-bundlerepository; and you will see the CloudBees Slack Integration added to the Managed Jenkins screen. - Next we will check the CloudBees Slack integration for your user by sending a test message. Click your CloudBees CI user name at the top of the screen and then click on the Slack Integration link in the contextual menu.
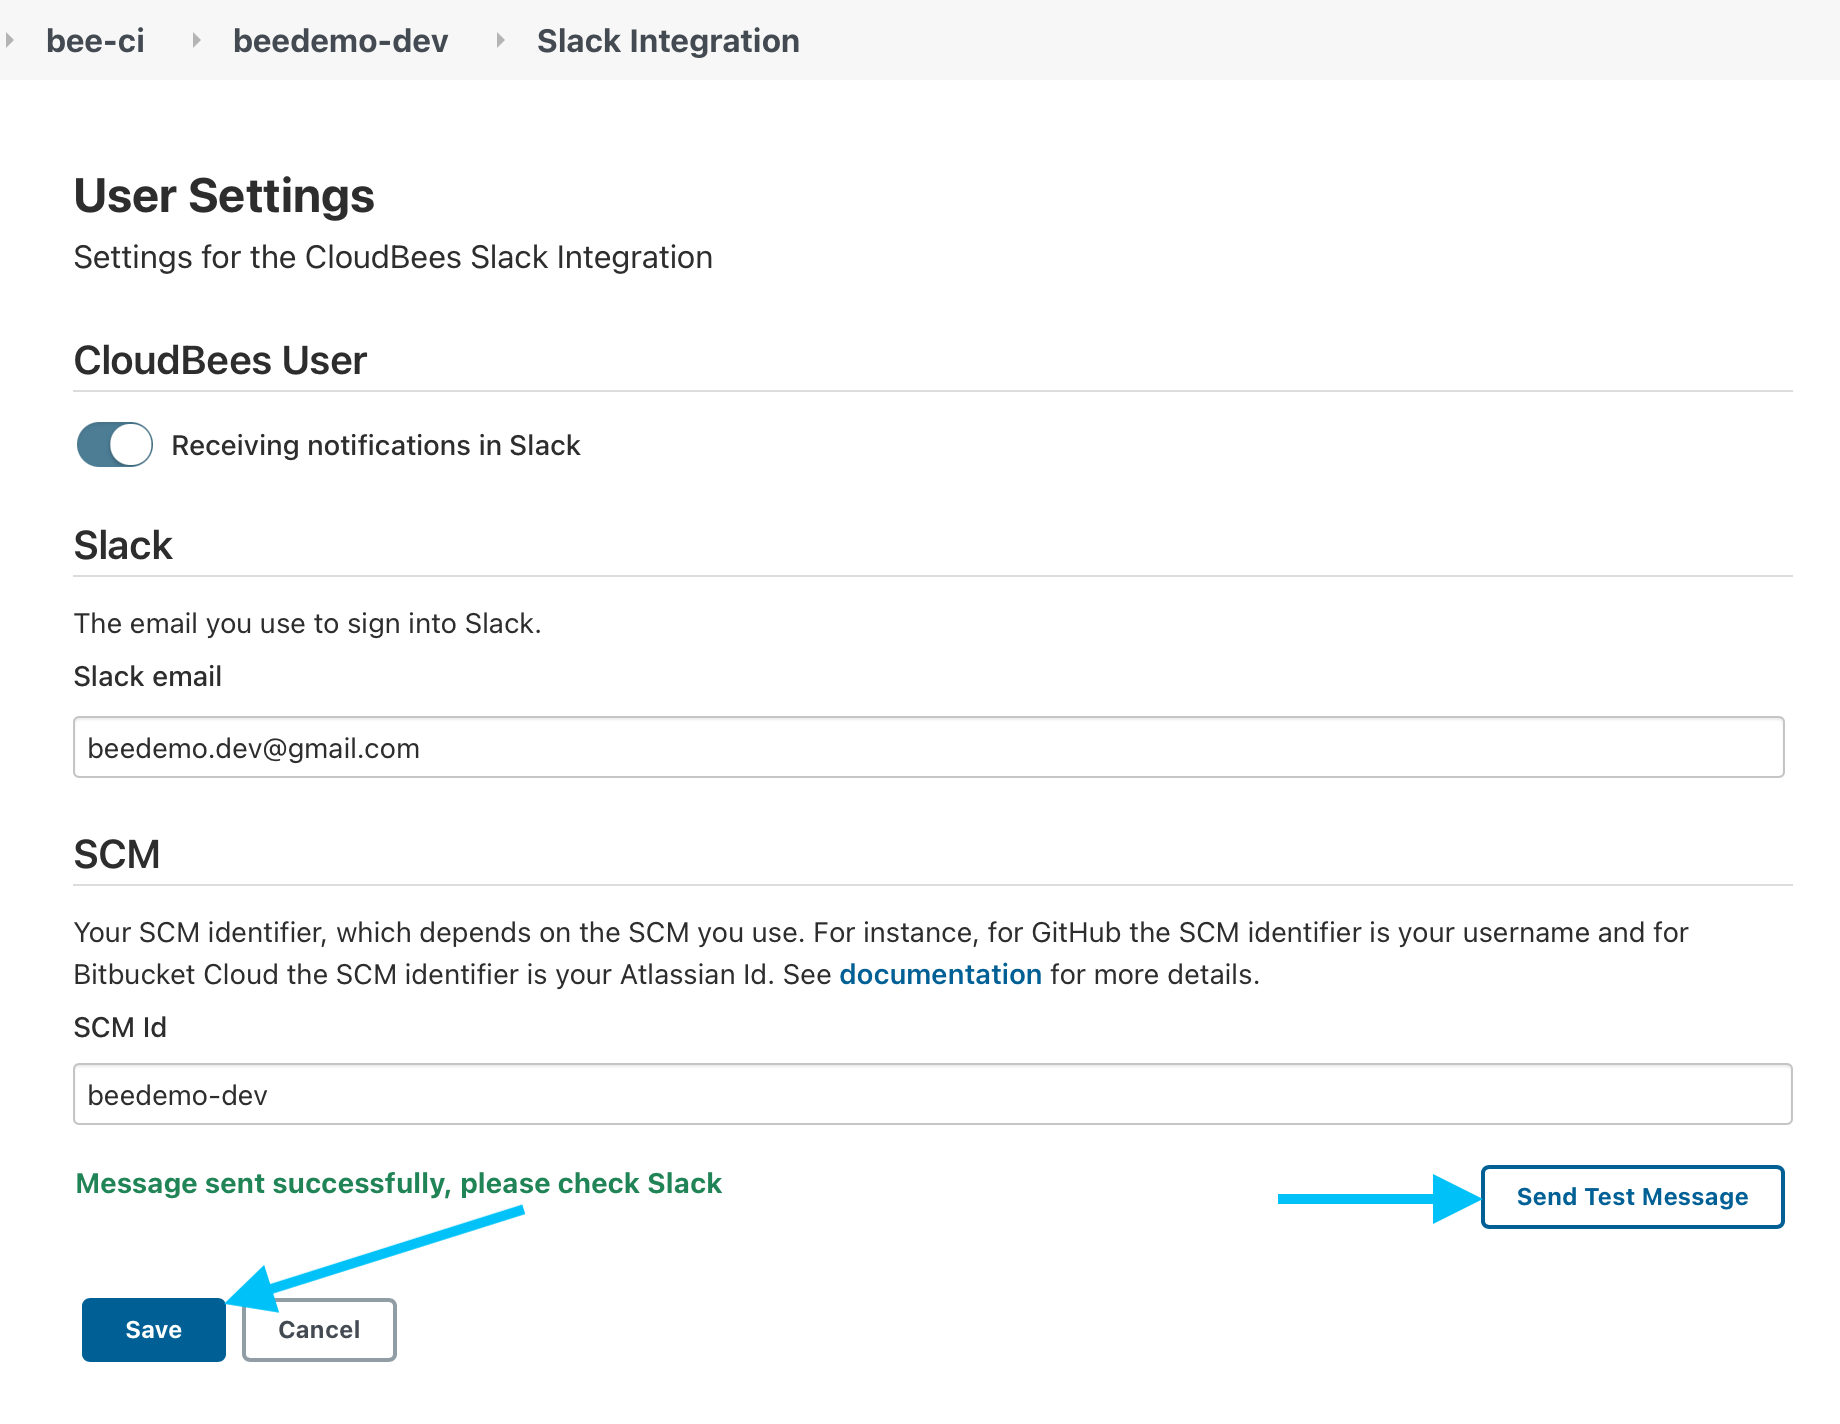
- On the User Settings screen for the CloudBees Slack Integration, click on the Send Test Message button and you should see the message “Message sent successfully, please check Slack”. If the test message is not sent successfully then make sure your Slack email is entered correctly. Finally, click on the Save button.
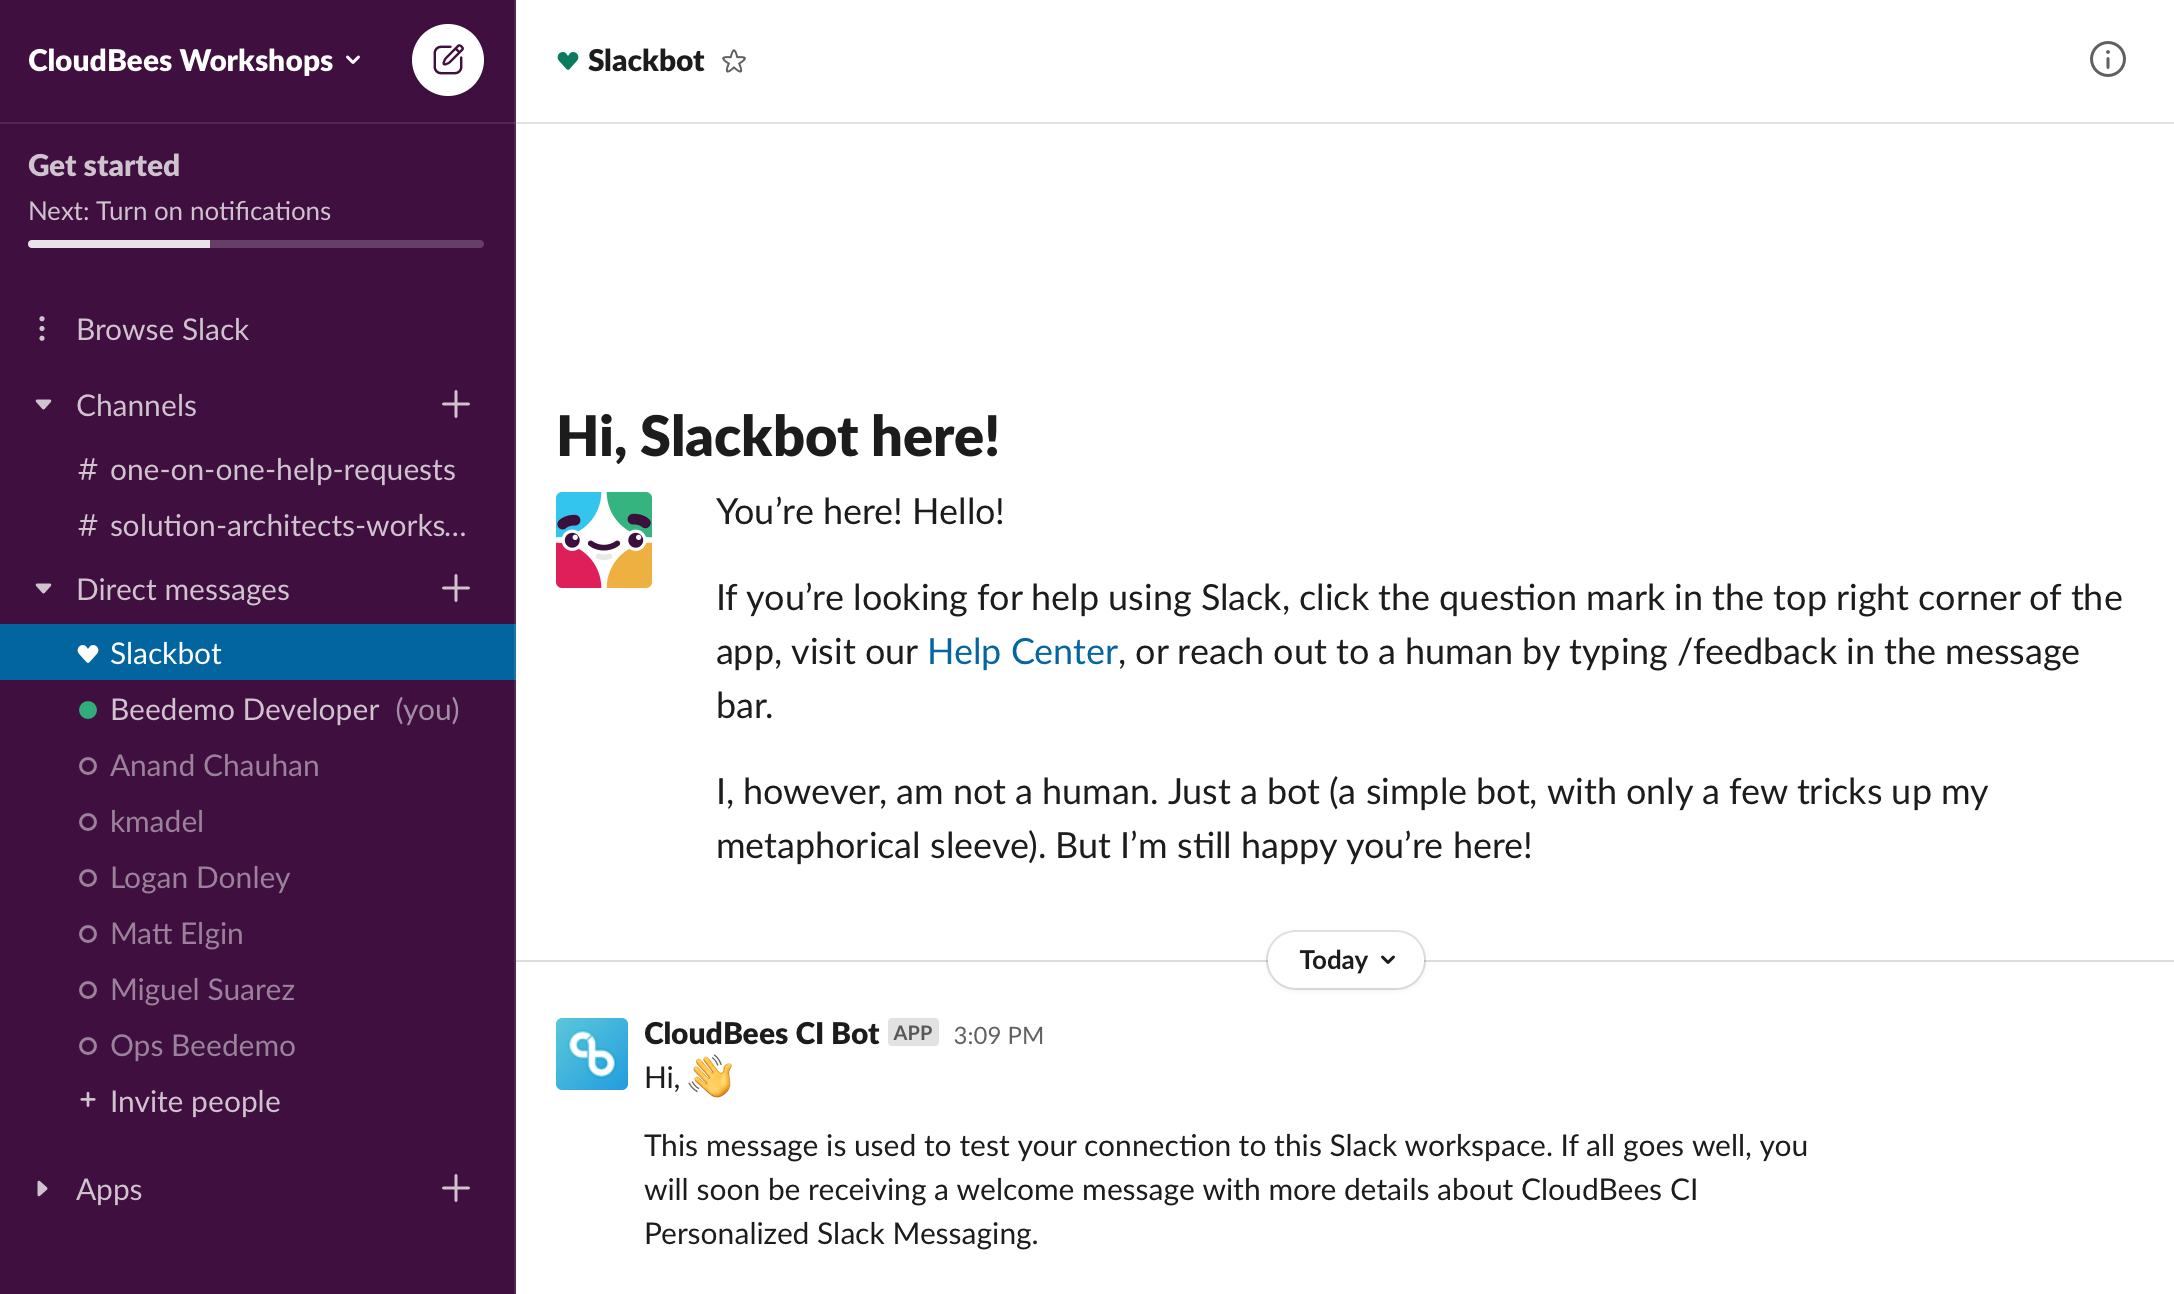
- Navigate to the CloudBees Workshops Slack workspace and you should see a direct message from the Slackbot.
For instructor led workshops please return to the workshop slides